
Email domains and mailboxes
Add your email domain, publish its DNS records, and create mailboxes for your team.
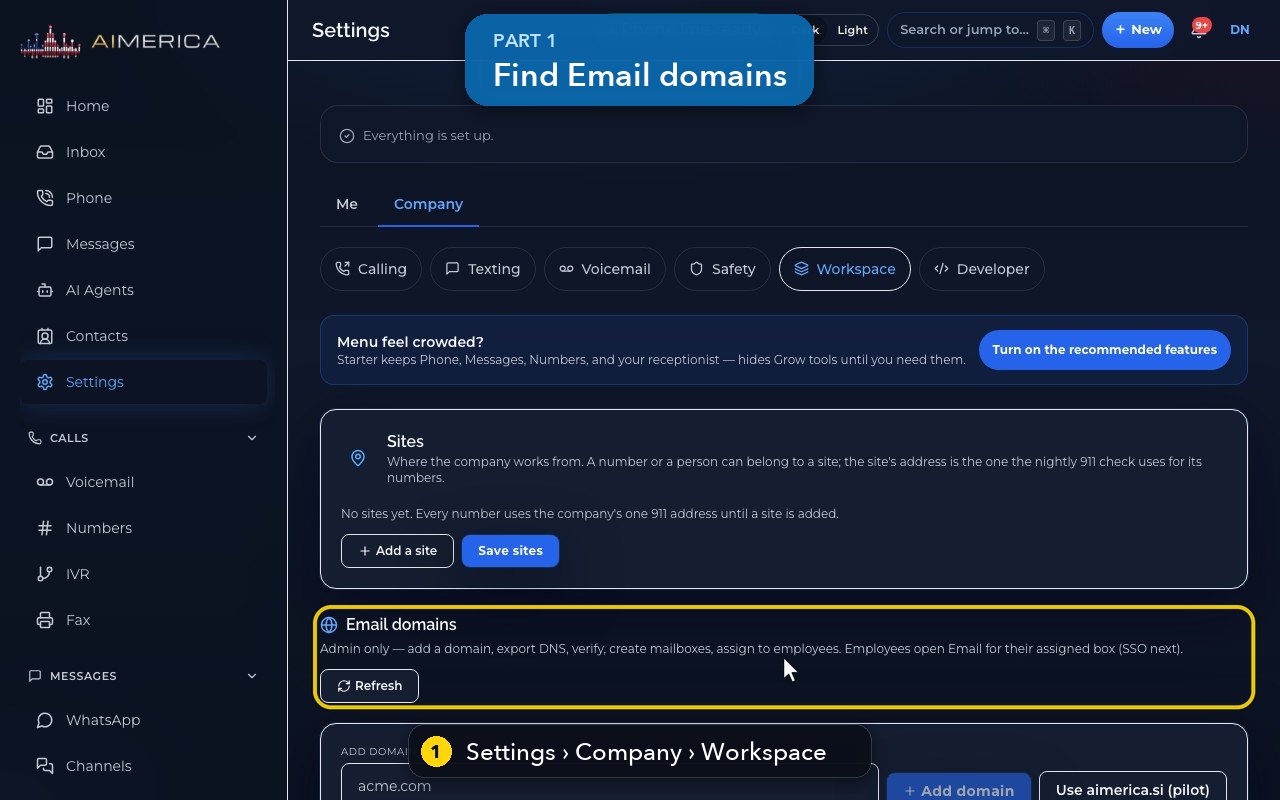
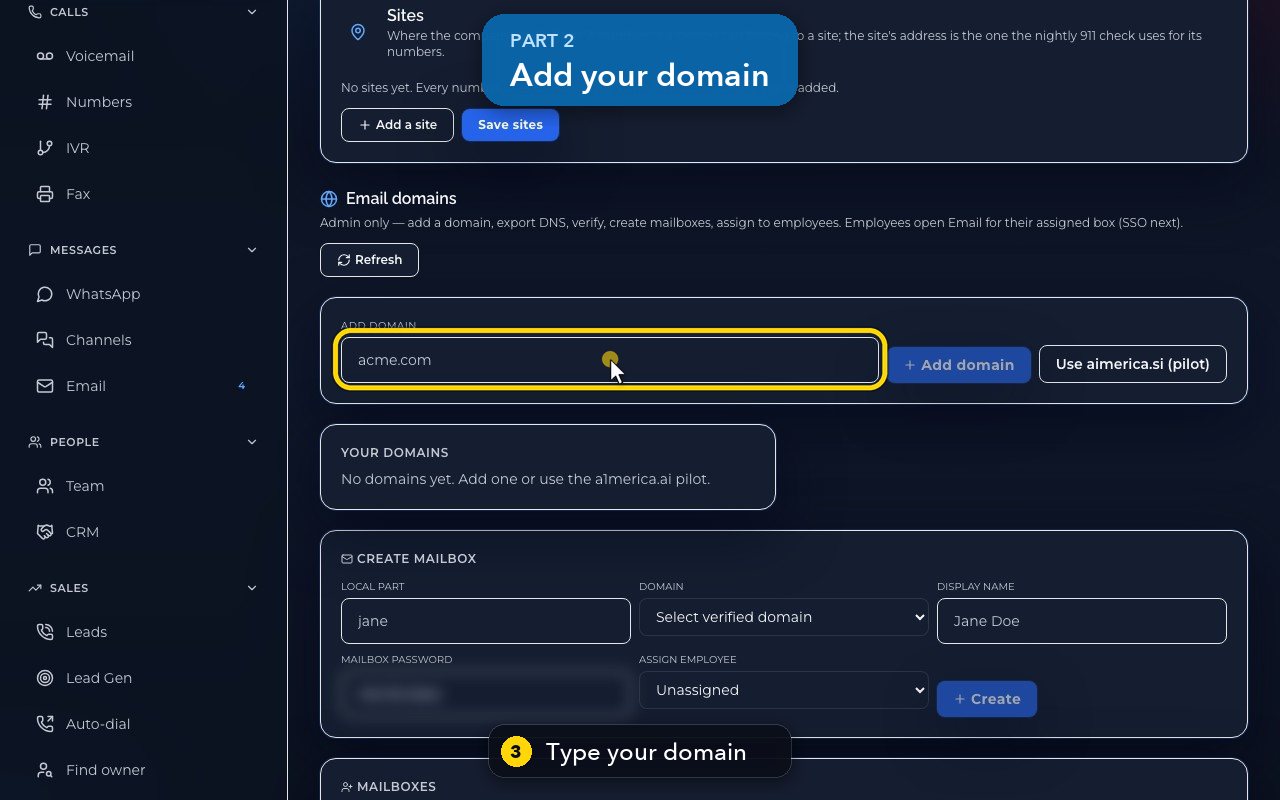
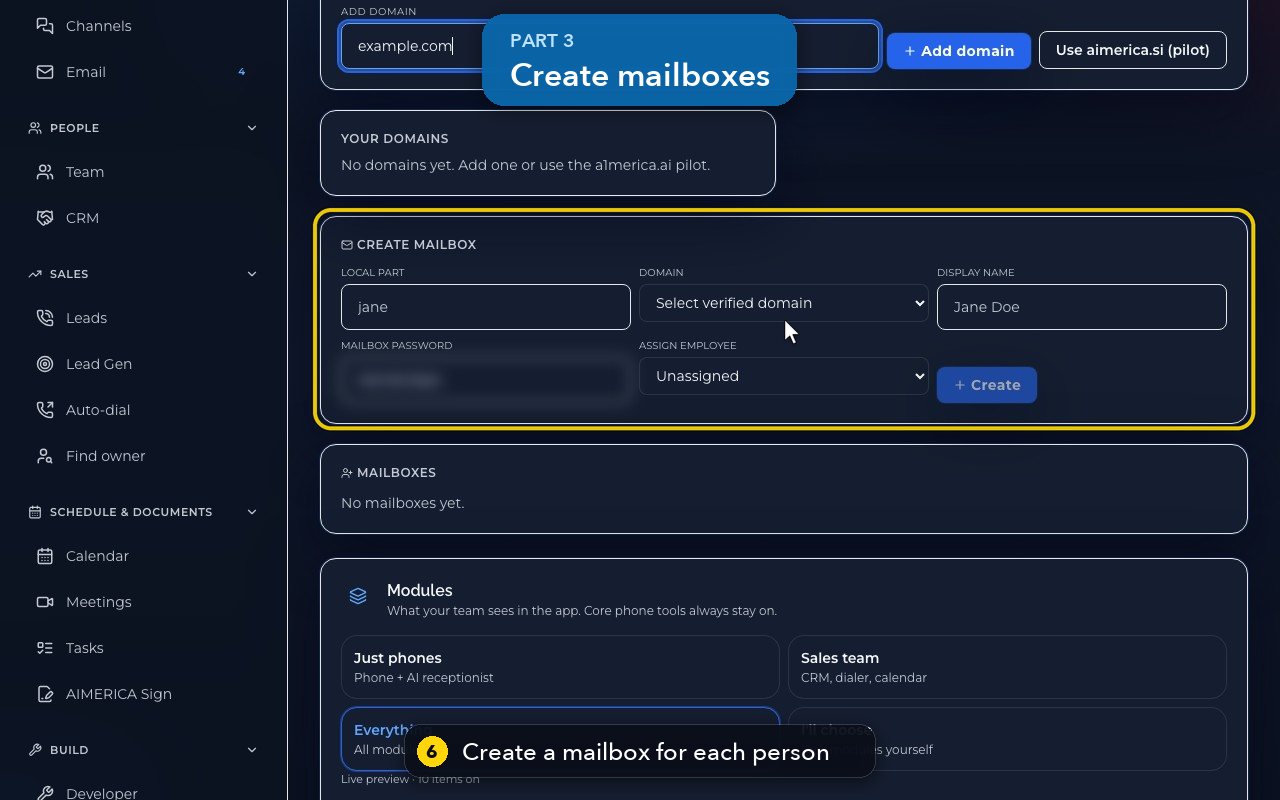
Admins open Settings › Company › Workspace and scroll to Email domains. Type your domain under Add domain and press Add domain: the page lists the DNS records to publish where your domain is hosted. Once they are published, press Verify DNS. Then use Create mailbox (name, verified domain, display name, password and the person it belongs to). Each person opens their mailbox in Email.
In this video
Step by step
- 1
Email domains are in Settings, Company, Workspace, for admins.
- 2
You add your domain, publish its DNS records, verify it, then create mailboxes and give each one to a person.
- 3
Type your domain here.
- 4
Add domain registers it and lists the DNS records to publish where your domain is hosted. In this demo, we do not add it.
- 5
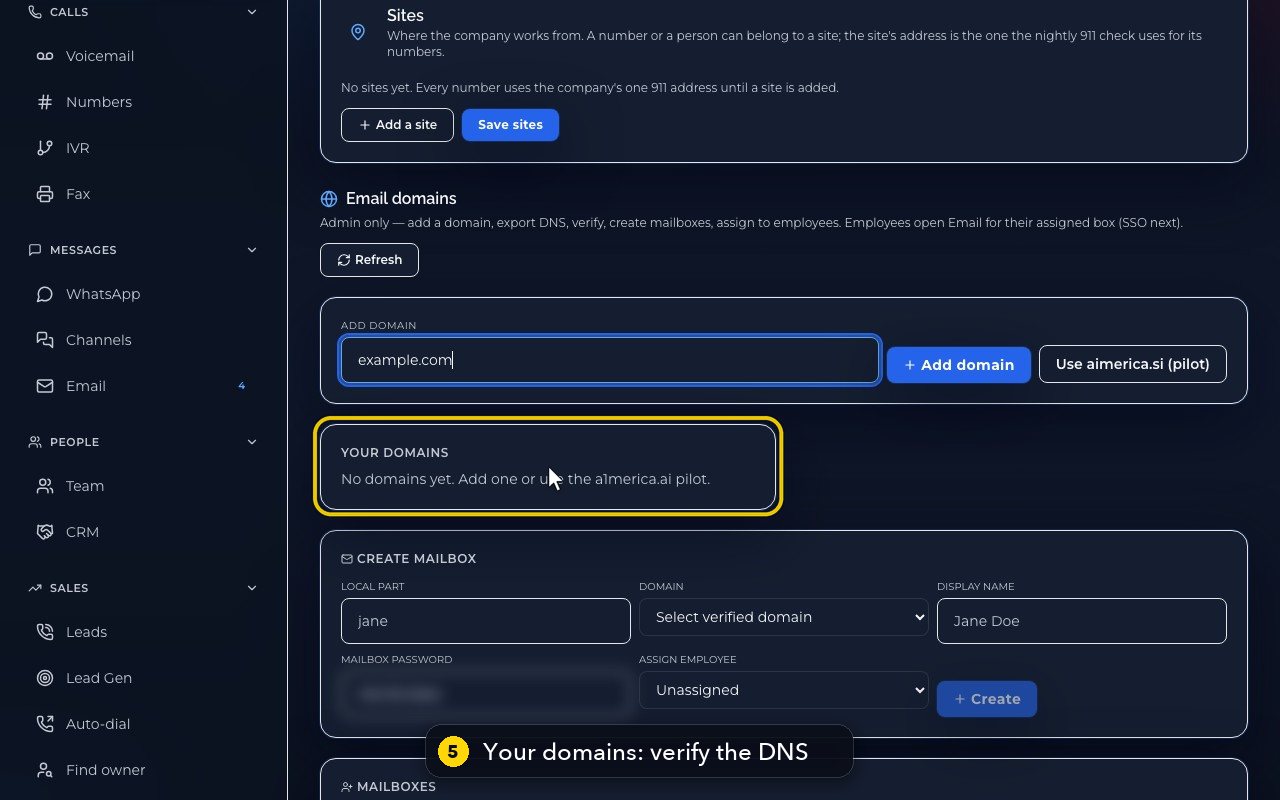
Your domains lists each one, pending until Verify DNS finds the records. Then mailboxes are allowed.
- 6
Create mailbox takes the name before the at sign, a verified domain, a display name, a password, and the person it belongs to.
- 7
Each person then opens their own mailbox in Email.
Related tutorials
 1:38VideoBusiness hours and call forwardingChoose when a line is open, and where calls go when you are closed, away or busy.
 1:18VideoChoose who answers each numberRead your numbers list and point each line at a person, a ring group, a phone menu or an AI agent.
 1:16VideoAdd a teammateInvite a new person with a title, a number and an extension, without ever knowing their password.
 1:15VideoExtensions: reach a colleague in a few digitsFind each person's extension, choose one for a new person, and dial it from the browser phone.
 1:24VideoCreate a ring group and choose how it ringsPut people in a group, choose whether phones ring together, one at a time or in turns, and point a number at it.
 1:23VideoGet a new phone numberSearch for a local or toll-free number, see the price, and know what happens before you add it.
Was this not what you needed? Write to us.