
The AI receptionist
It answers, takes the message, and emails you.
Click New at the top, then AI agent. A new account also finds Set up receptionist in AI Agents.
In this video
Step by step
- 1
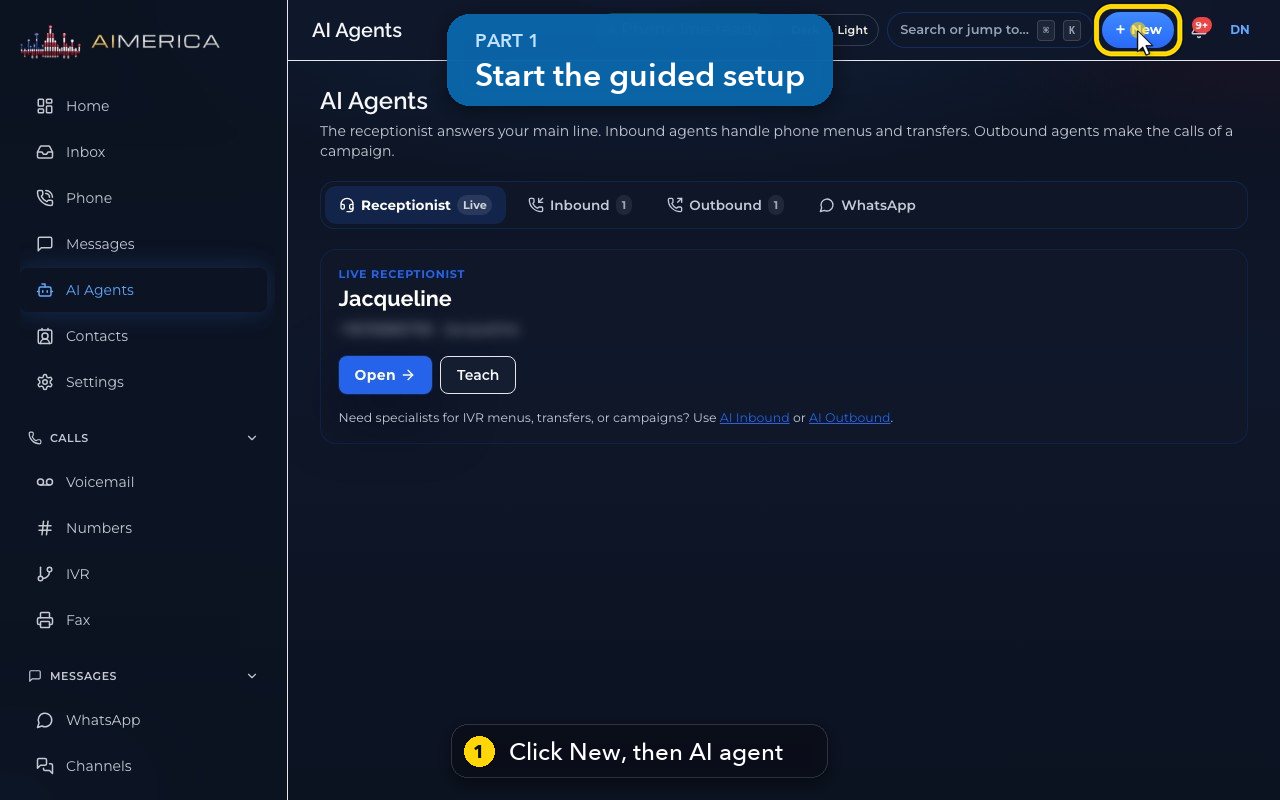
To start, click New at the top, then AI agent.
- 2
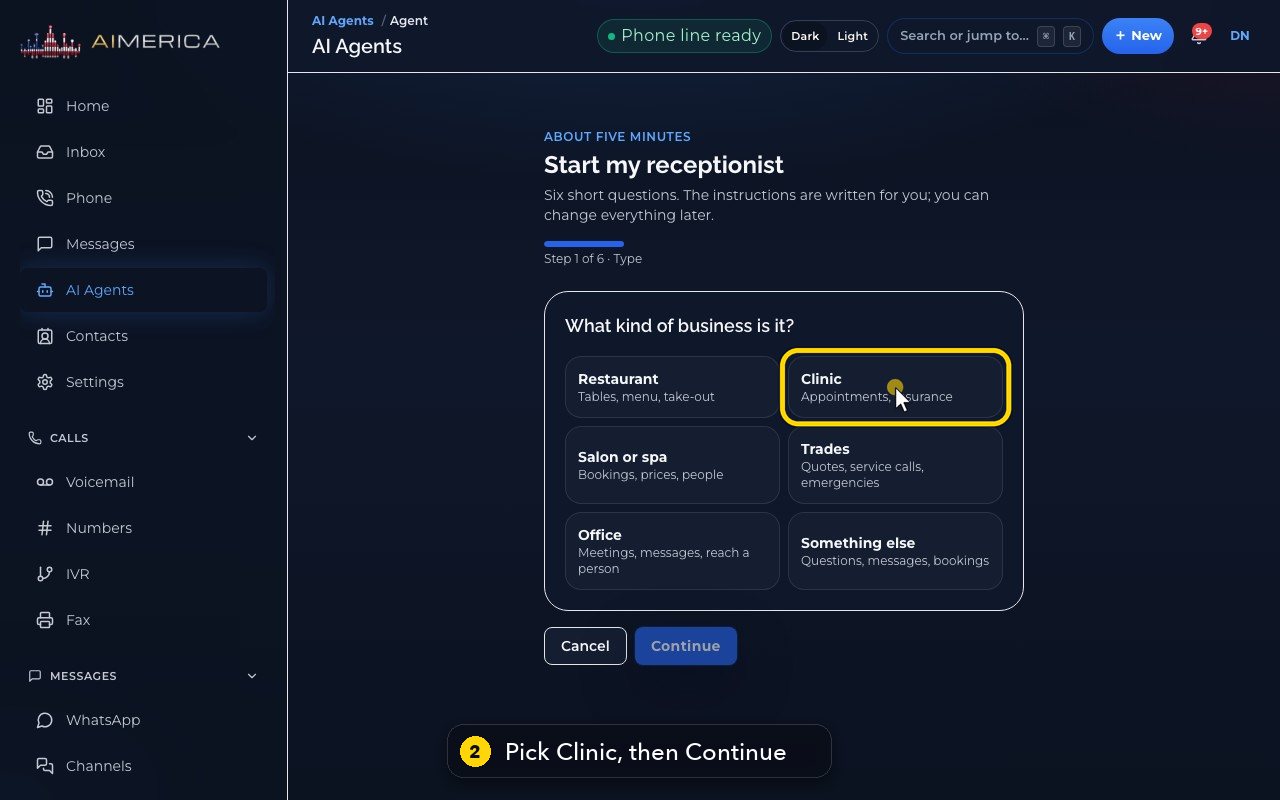
First, pick your kind of business. A dental office is a Clinic. Then click Continue.
- 3
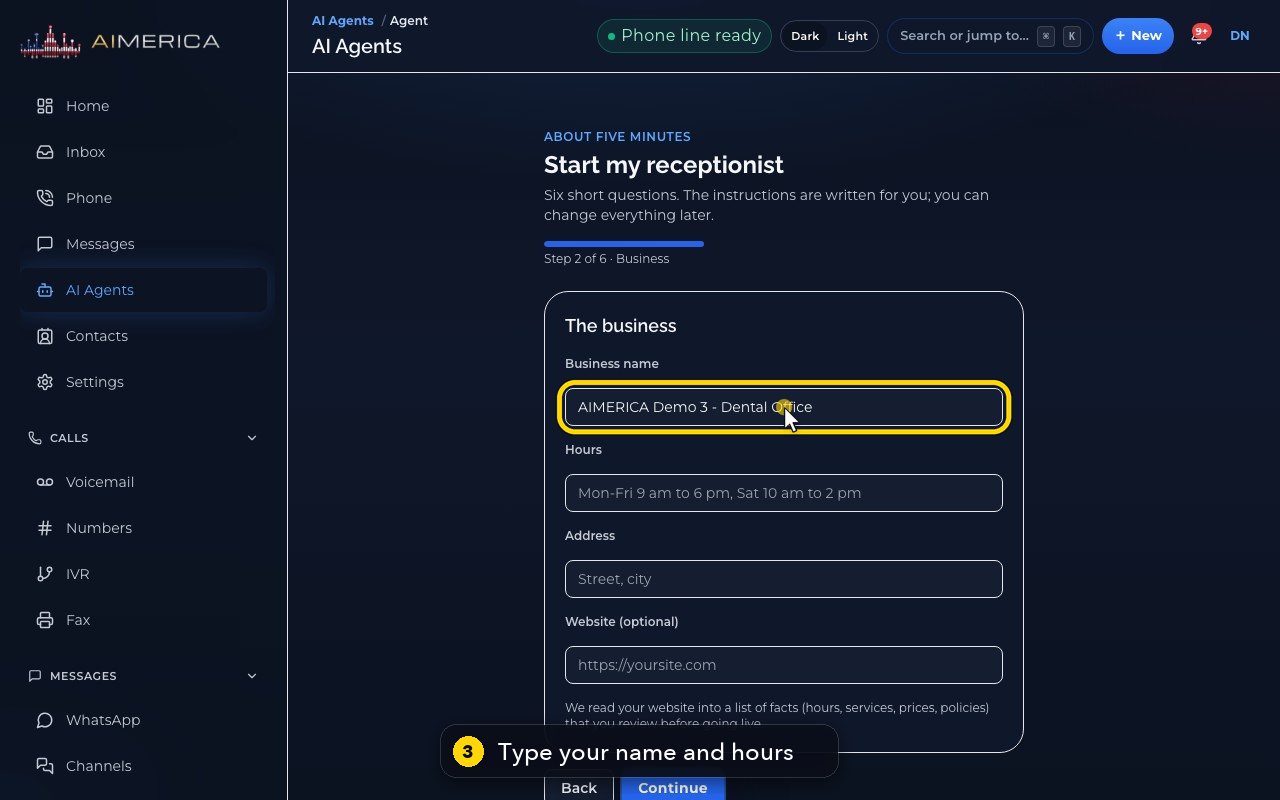
Type your business name, and then your hours.
- 4
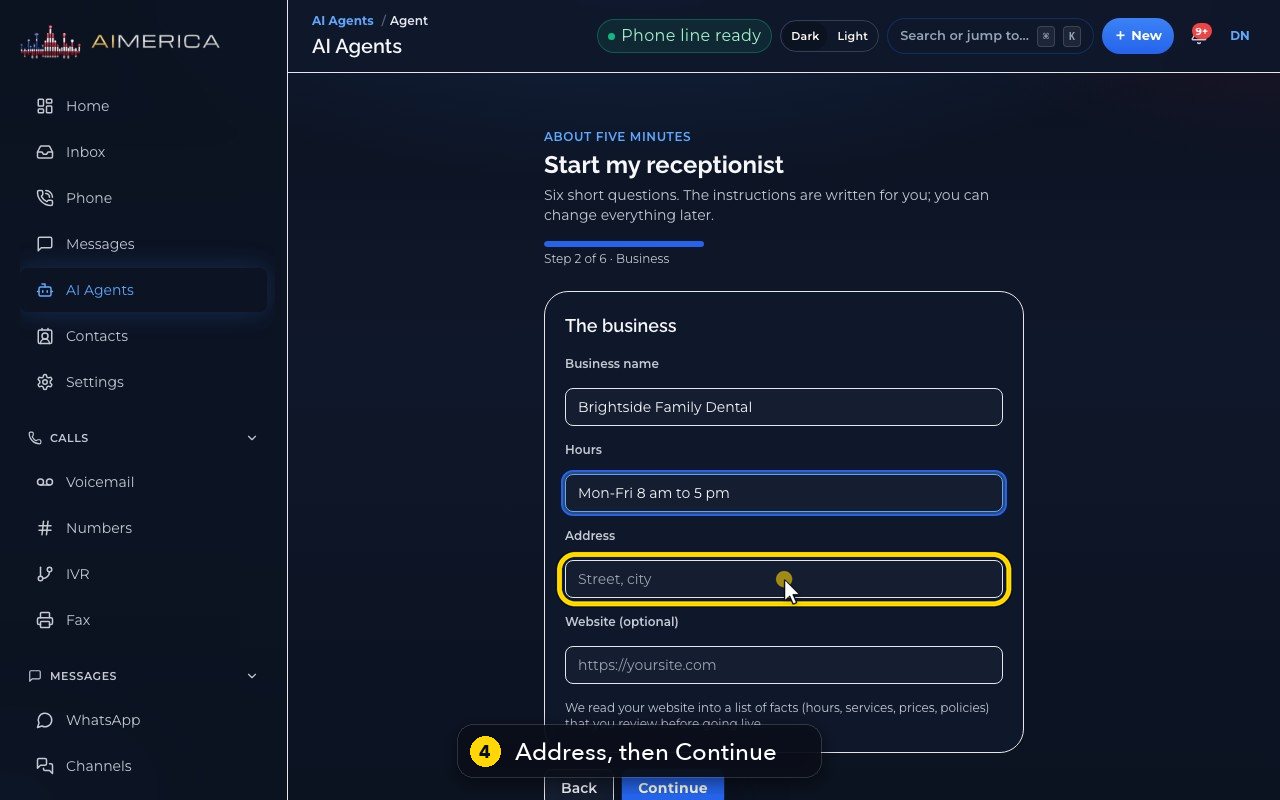
Then your address. Your hours become her opening hours, and the website is optional. Click Continue.
- 5
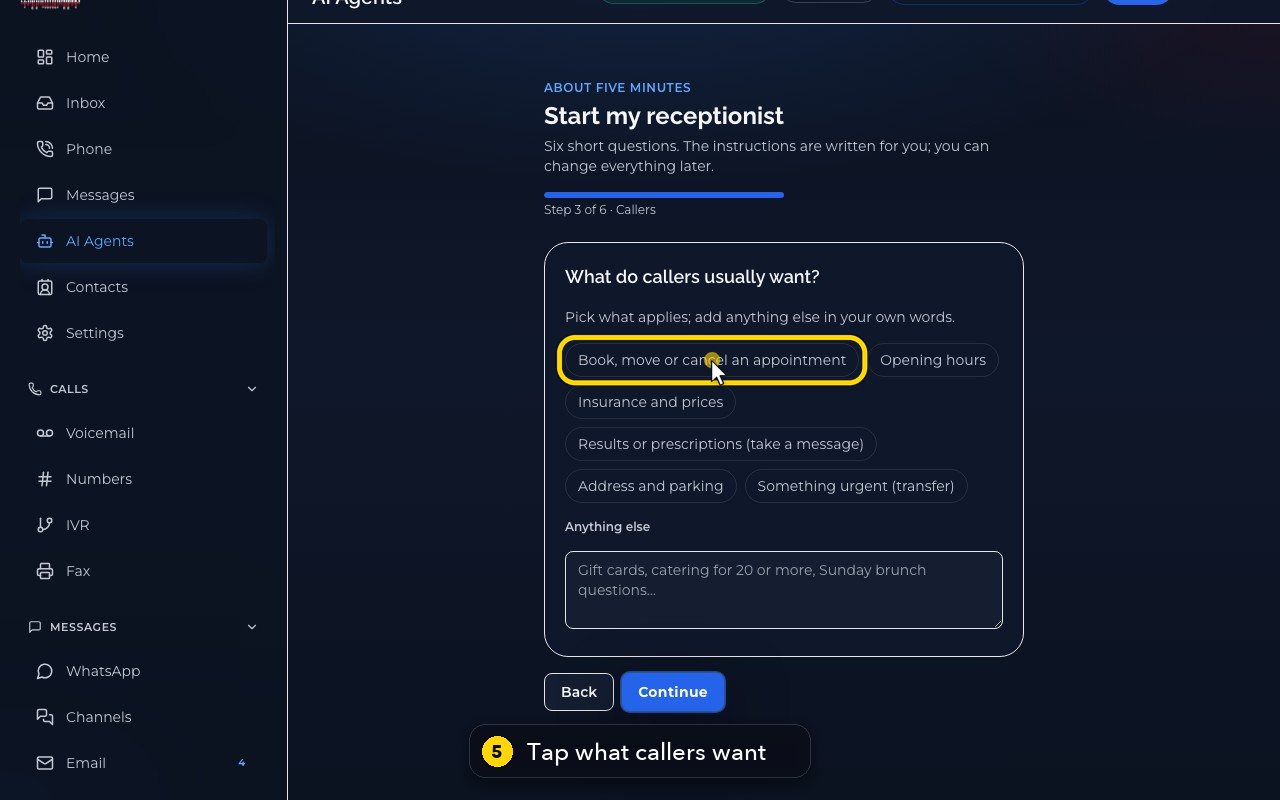
Tap what callers usually want, like an appointment, or insurance and prices. Then click Continue.
- 6
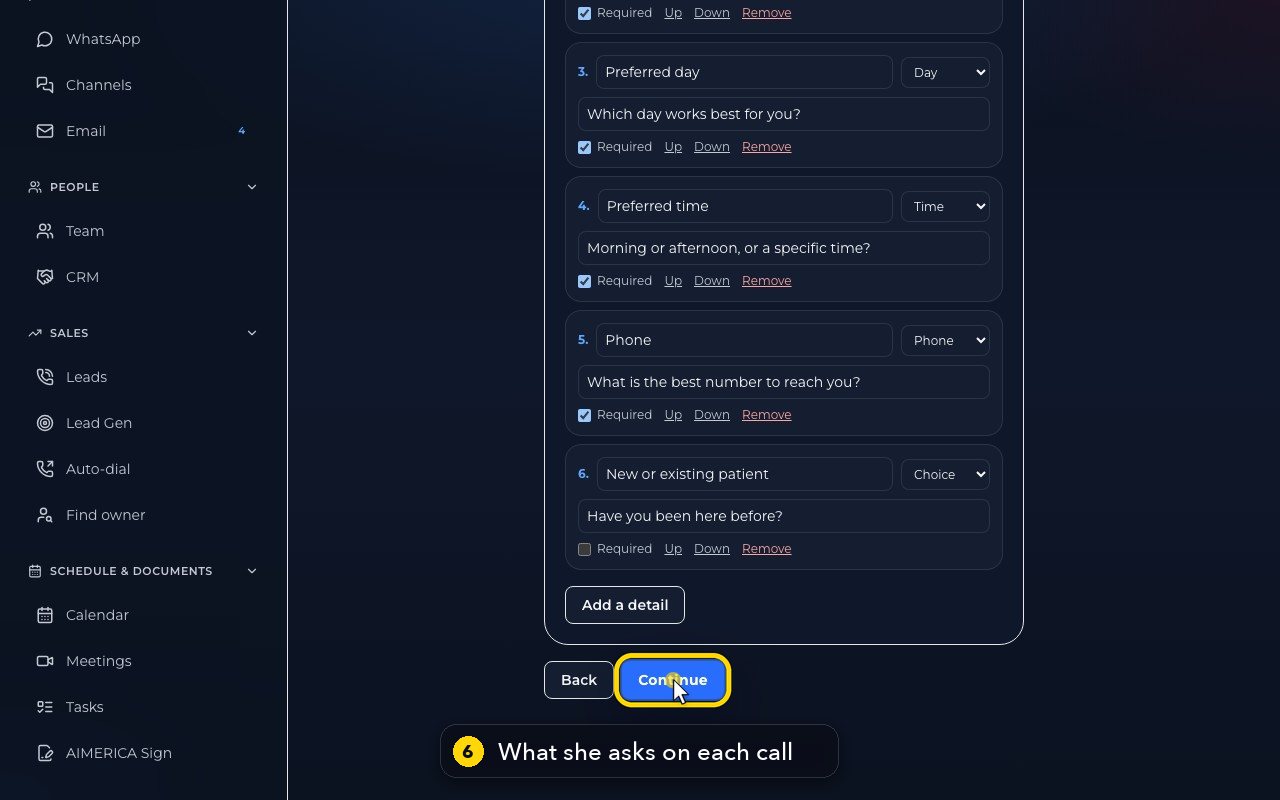
This is what she asks on each call, one question at a time. Click Continue.
- 7
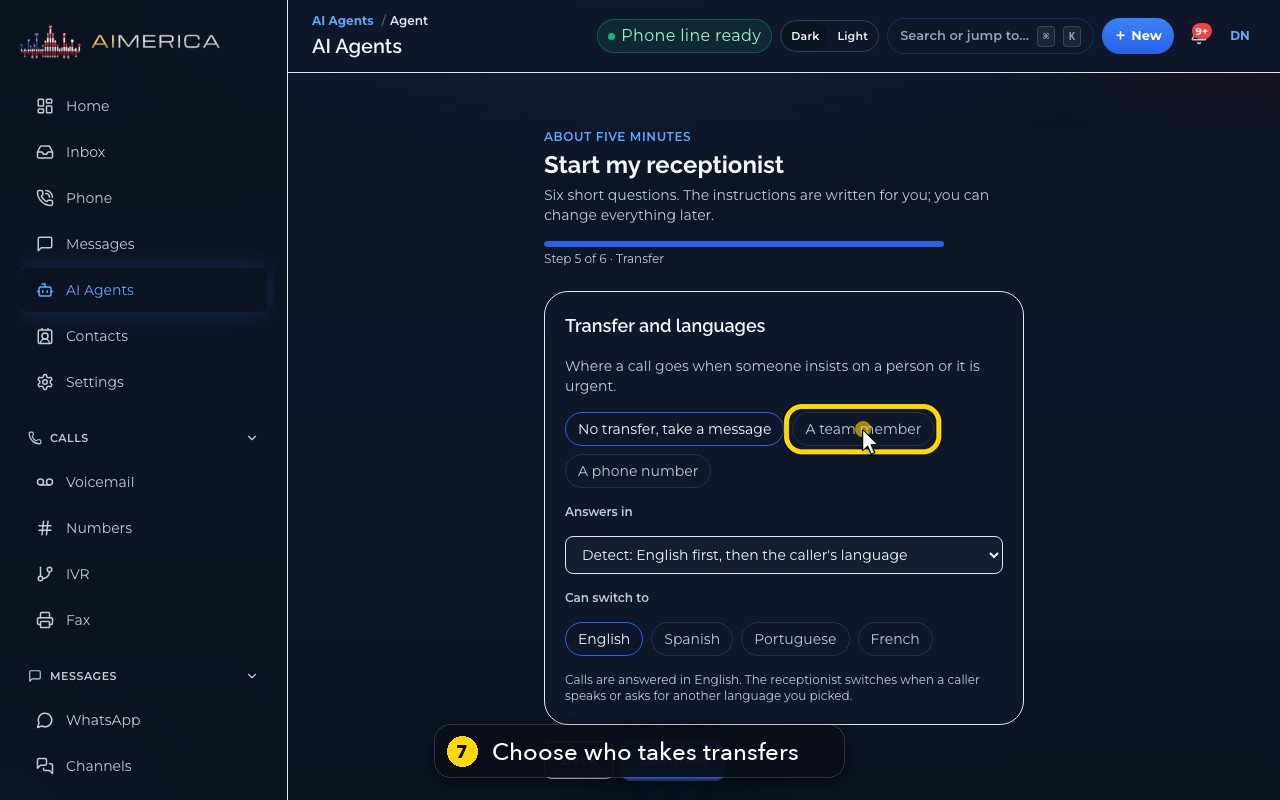
Choose where she sends a caller who insists on a person, or an urgent call. Here, a team member, then Maria.
- 8
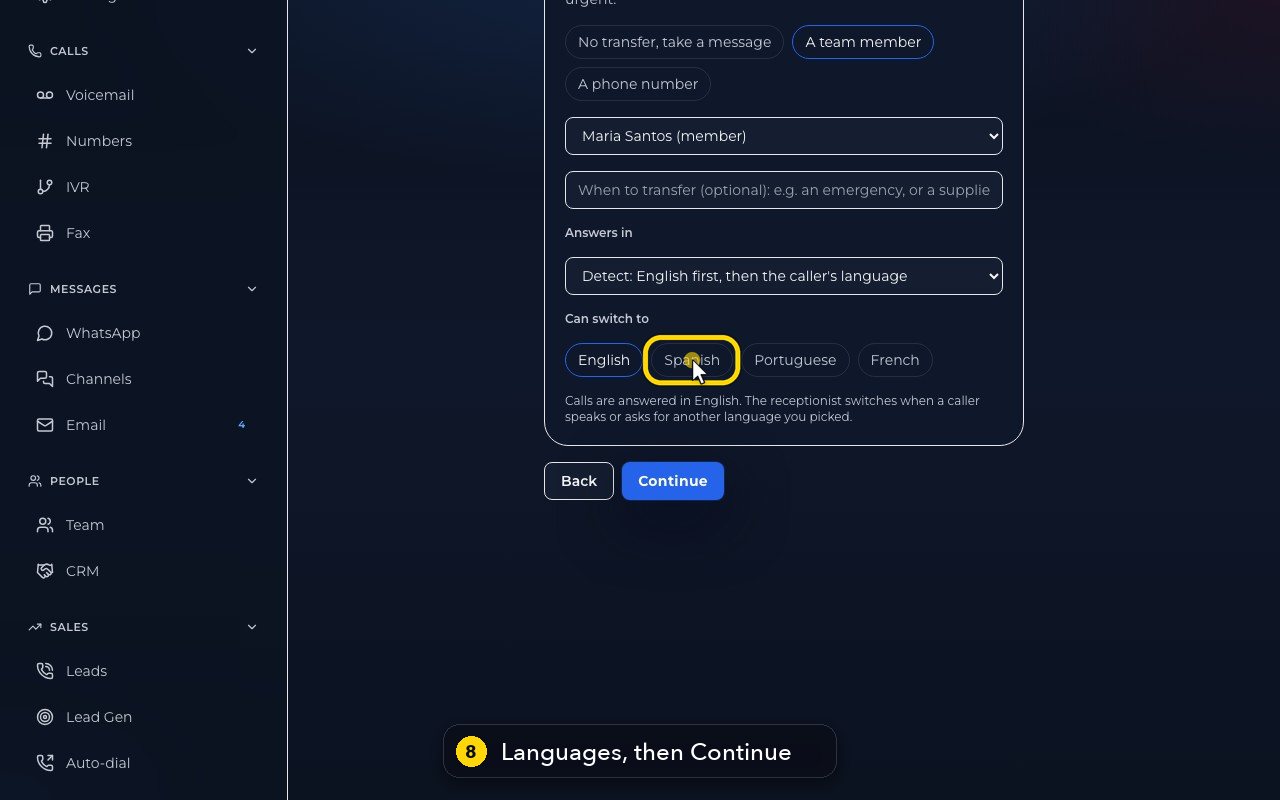
Calls are answered in English. She switches when a caller speaks another language you pick, like Spanish. Click Continue.
- 9
Play lets you hear each voice. Choose the one you like: her name follows the voice.
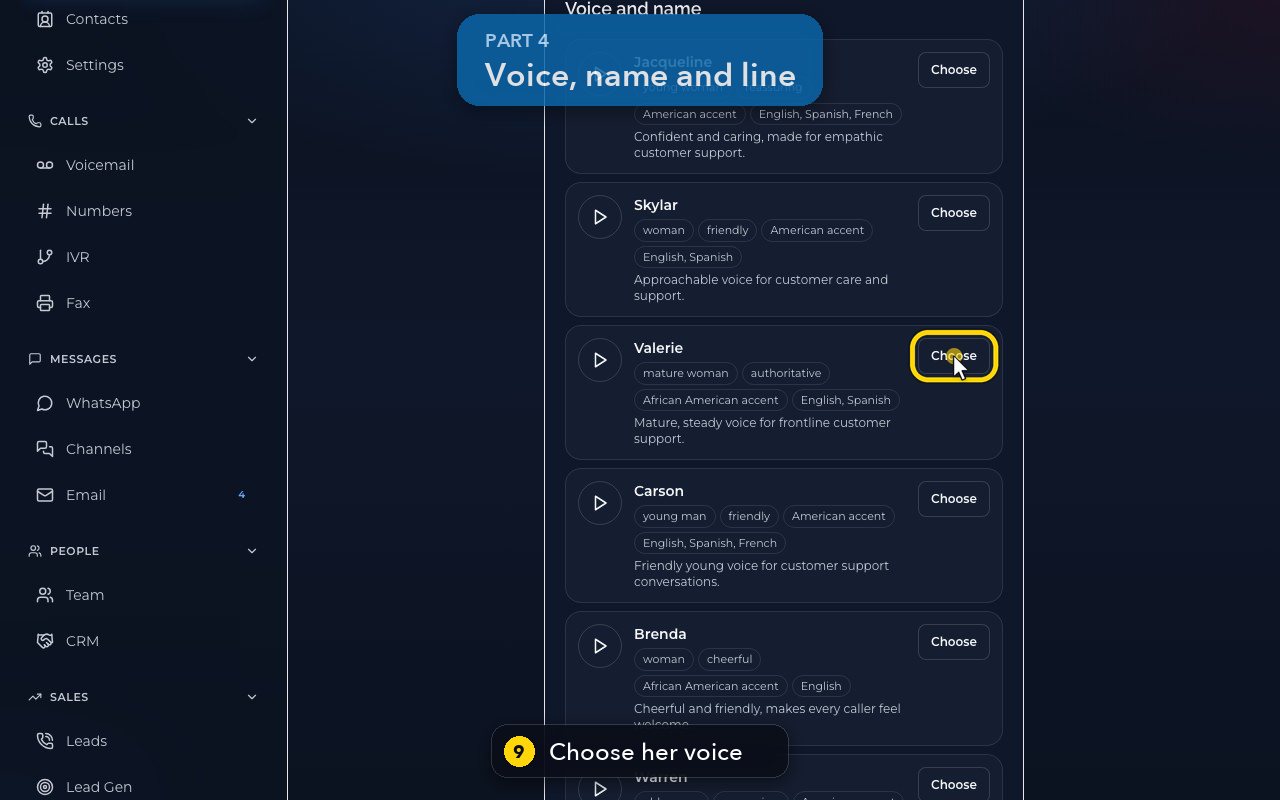
- 10
Check her name, and the greeting written from your answers. You can rewrite it.
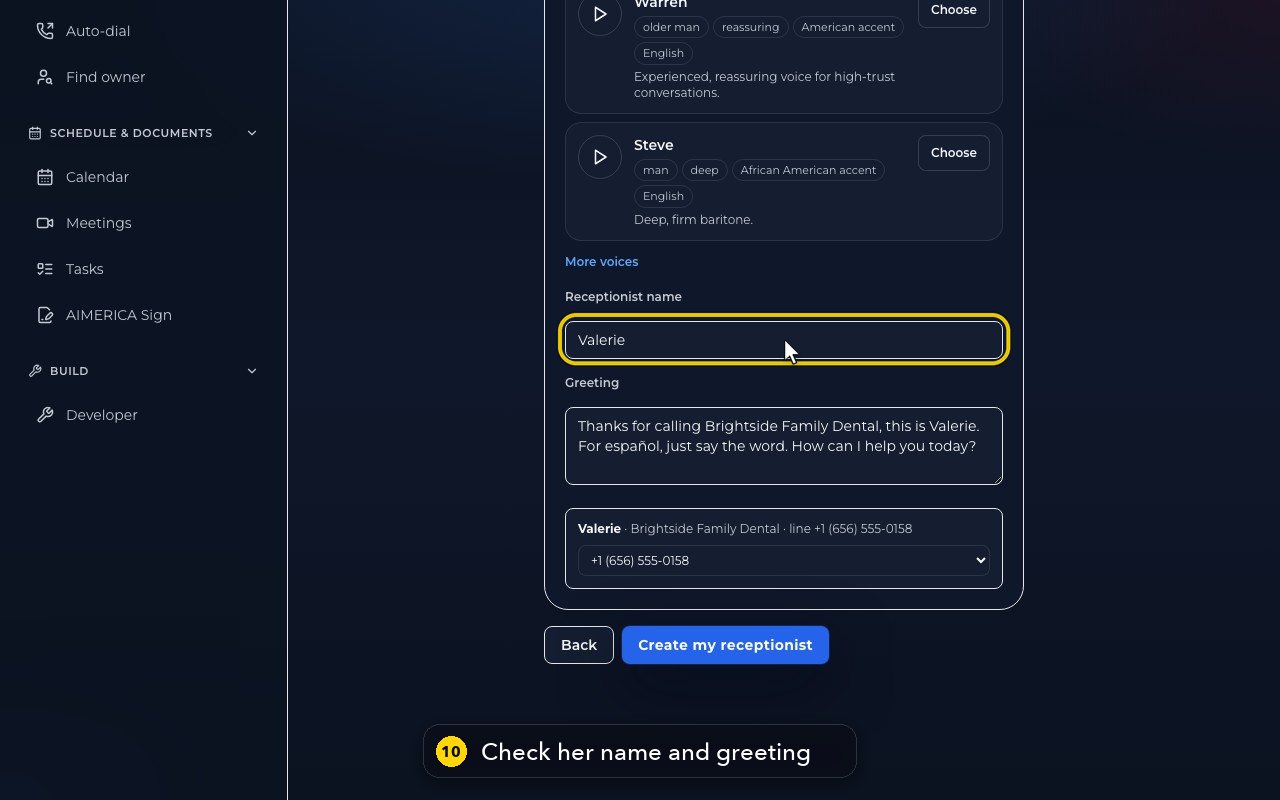
- 11
Pick the line she answers. A line that already answers for someone asks you to confirm first.
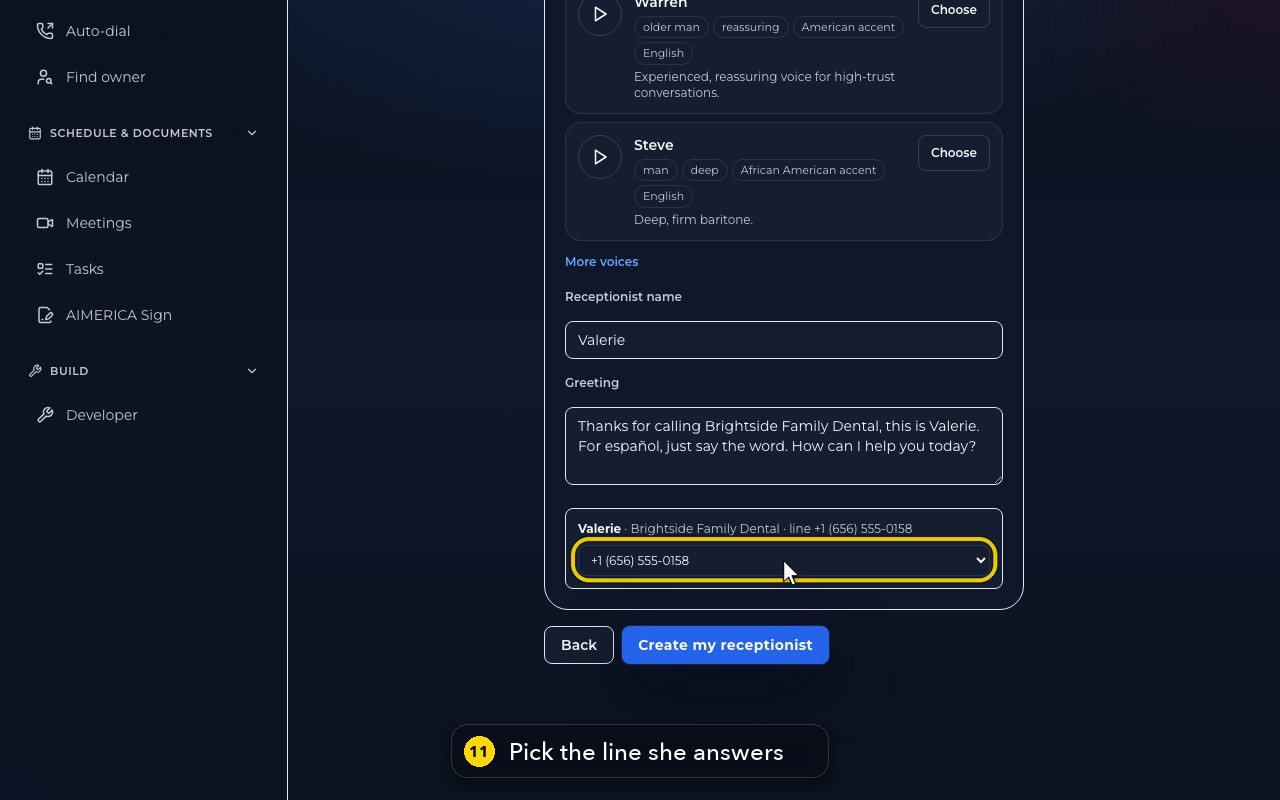
- 12
Create my receptionist builds her, and puts her on that line. In this demo, we stop here.
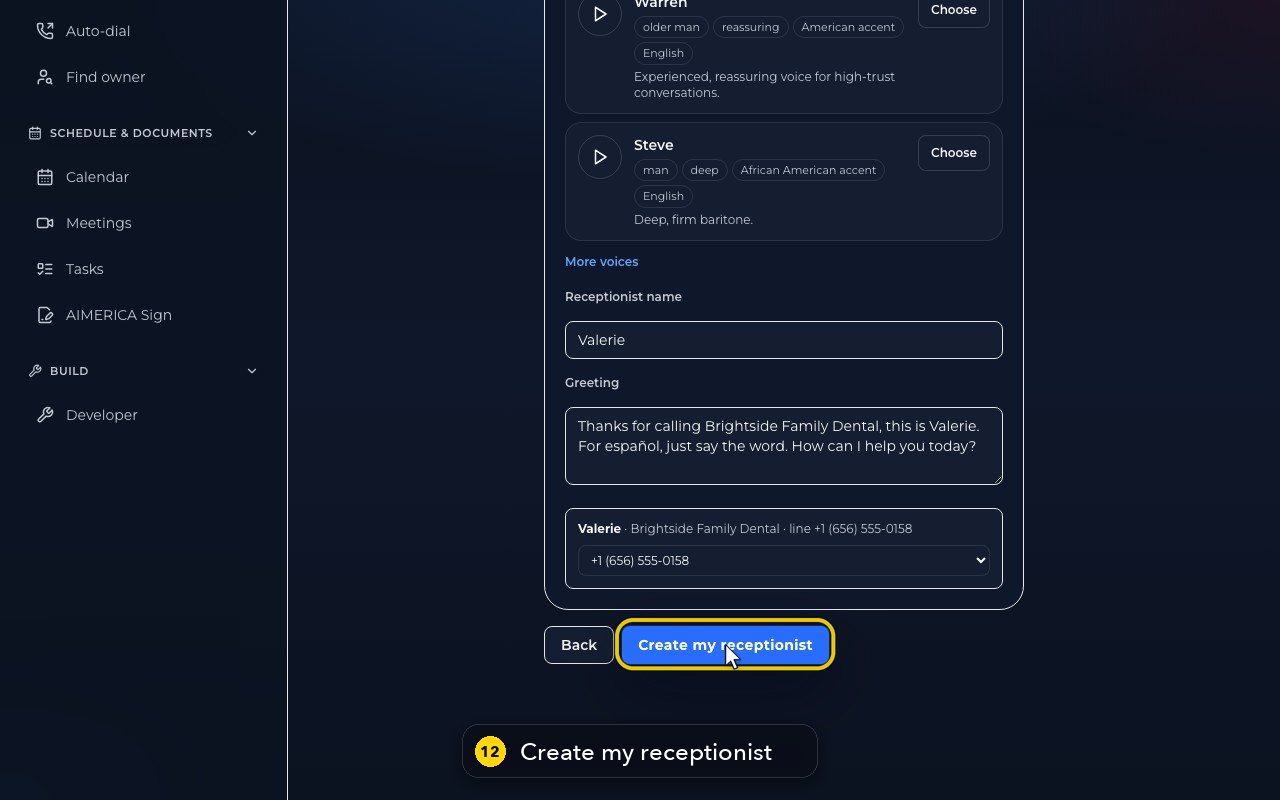
- 13
To leave without creating anything, click AI Agents in the menu.
Choose who your receptionist transfers calls to
See and add the people and numbers your receptionist may transfer a caller to, and when she should.
Transfers are on your receptionist's page in AI Agents, on the Basics tab, under Transfers and questions.
In this video
Step by step (11 steps)
- 1
Your receptionist transfers callers only to the people and numbers you list. Click AI Agents, in the menu on the left.
- 2
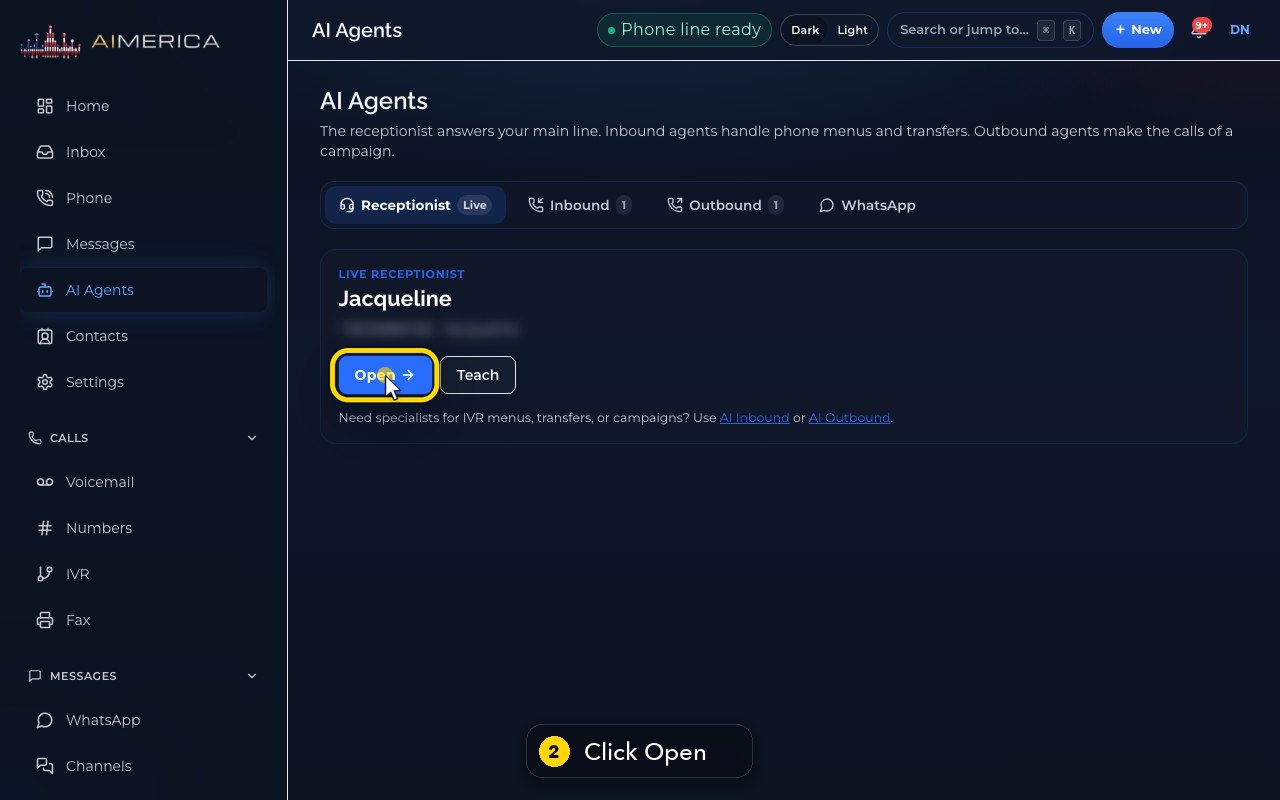
Click Open on her card. Her page opens on the Basics tab.
- 3
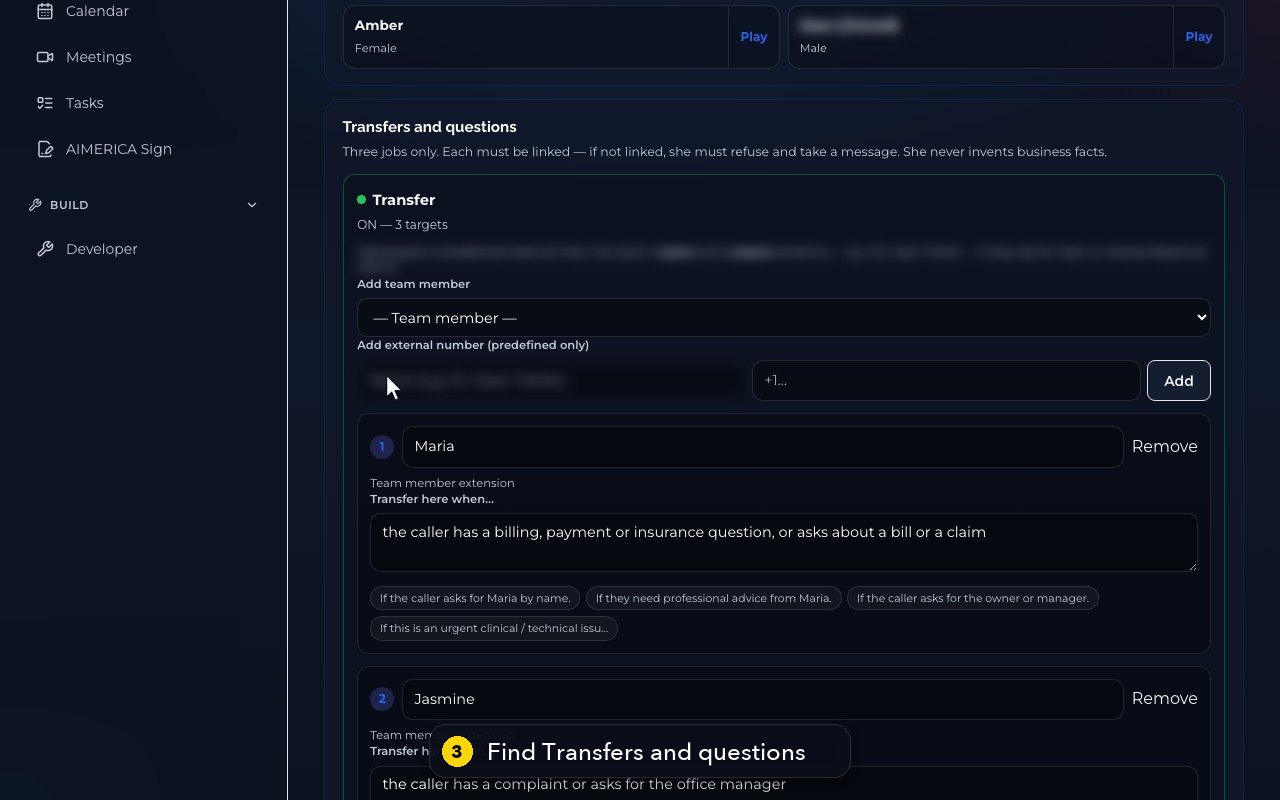
Scroll down to Transfers and questions. Here, Jacqueline has three targets.
- 4
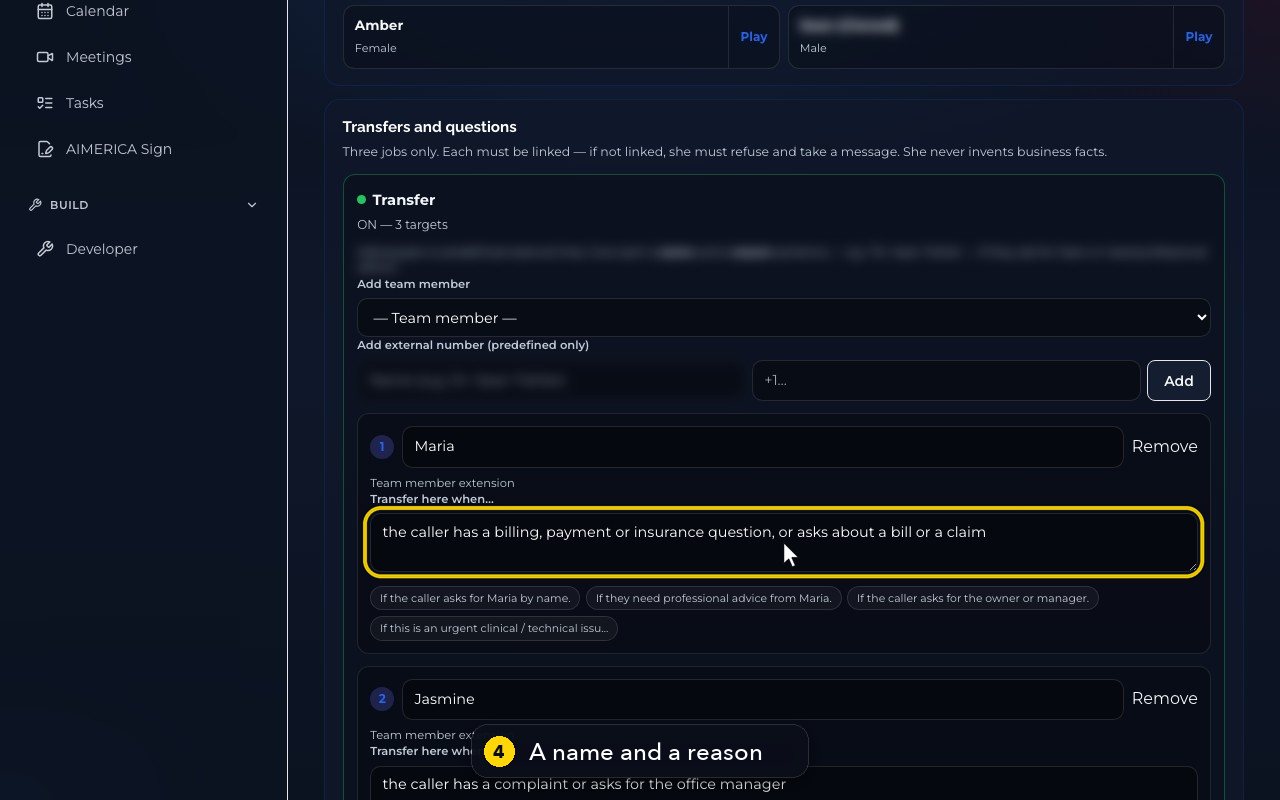
Each target has a name and a reason. Maria takes billing, payment and insurance questions.
- 5
When she transfers, she says: One moment, I'm transferring you to Maria now.
- 6
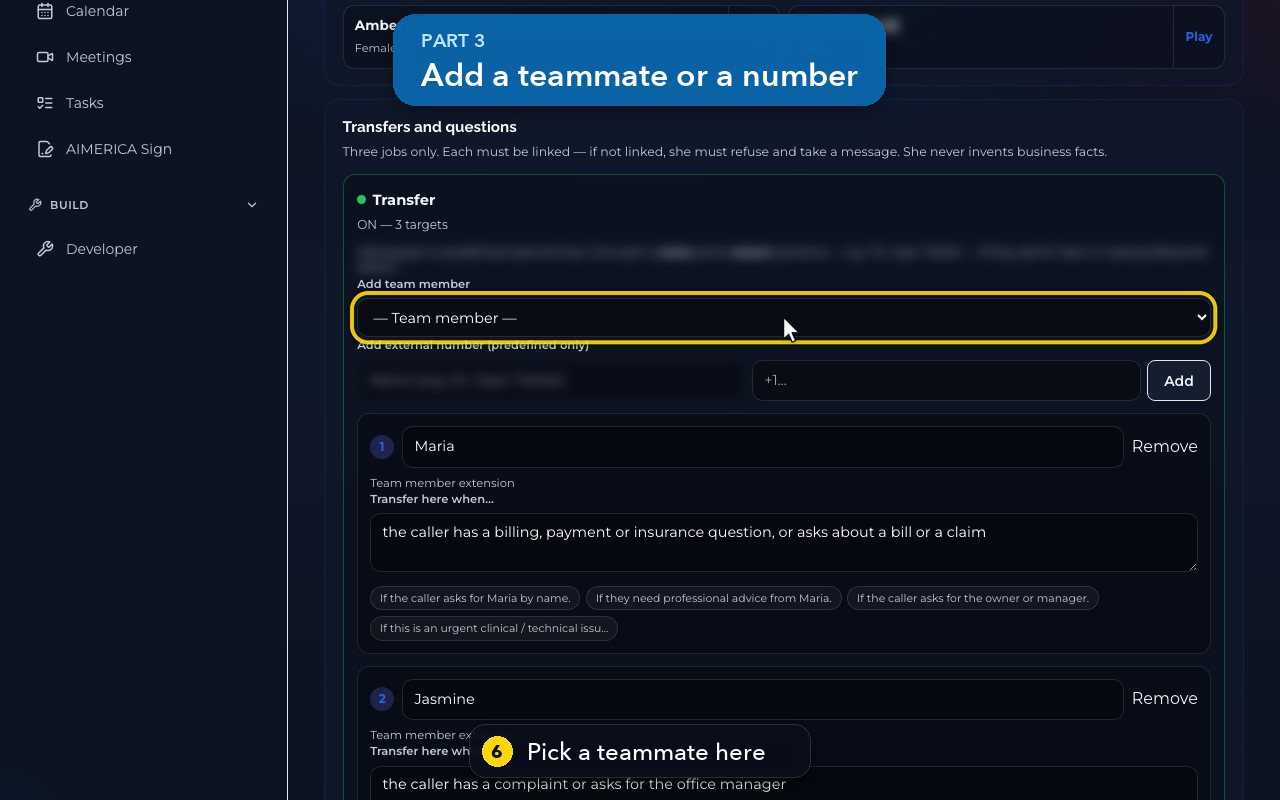
To add a teammate, pick them in the Team member list.
- 7
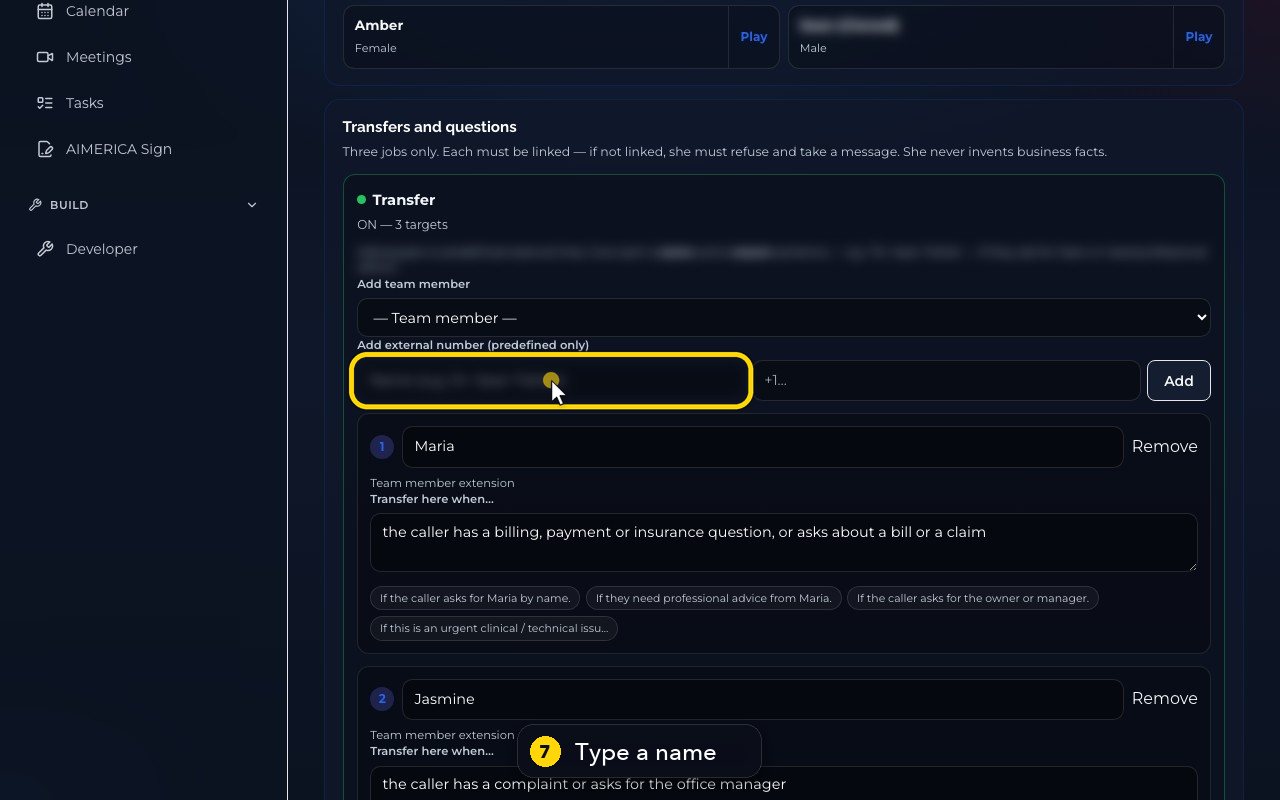
To add an outside number, like an answering service, type its name.
- 8
Then type the number.
- 9
Add would put it on the list. In this demo, we do not add it.
- 10
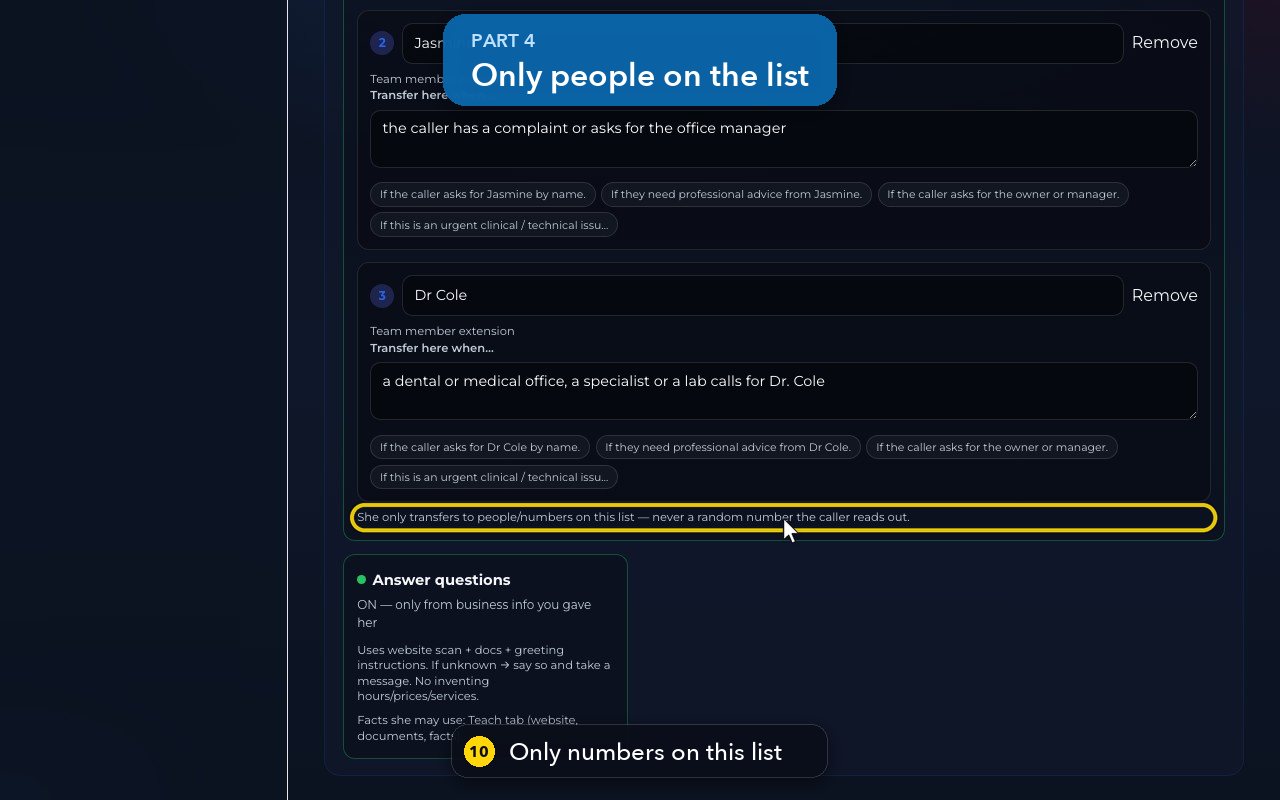
She never transfers to a number a caller reads out. If a caller asks for someone not on the list, she takes a message instead.
- 11
We did not press Add, so nothing was saved. Now we can leave the page.
Teach your receptionist your facts
Review and add the facts your receptionist answers from: hours, services, prices, policies and common questions.
Your receptionist's facts are on her page in AI Agents, on the Teach tab, under Knowledge.
In this video
Step by step (14 steps)
- 1
Your receptionist answers questions only from the facts you give her. Click AI Agents, in the menu on the left.
- 2
Click Open on her card.
- 3
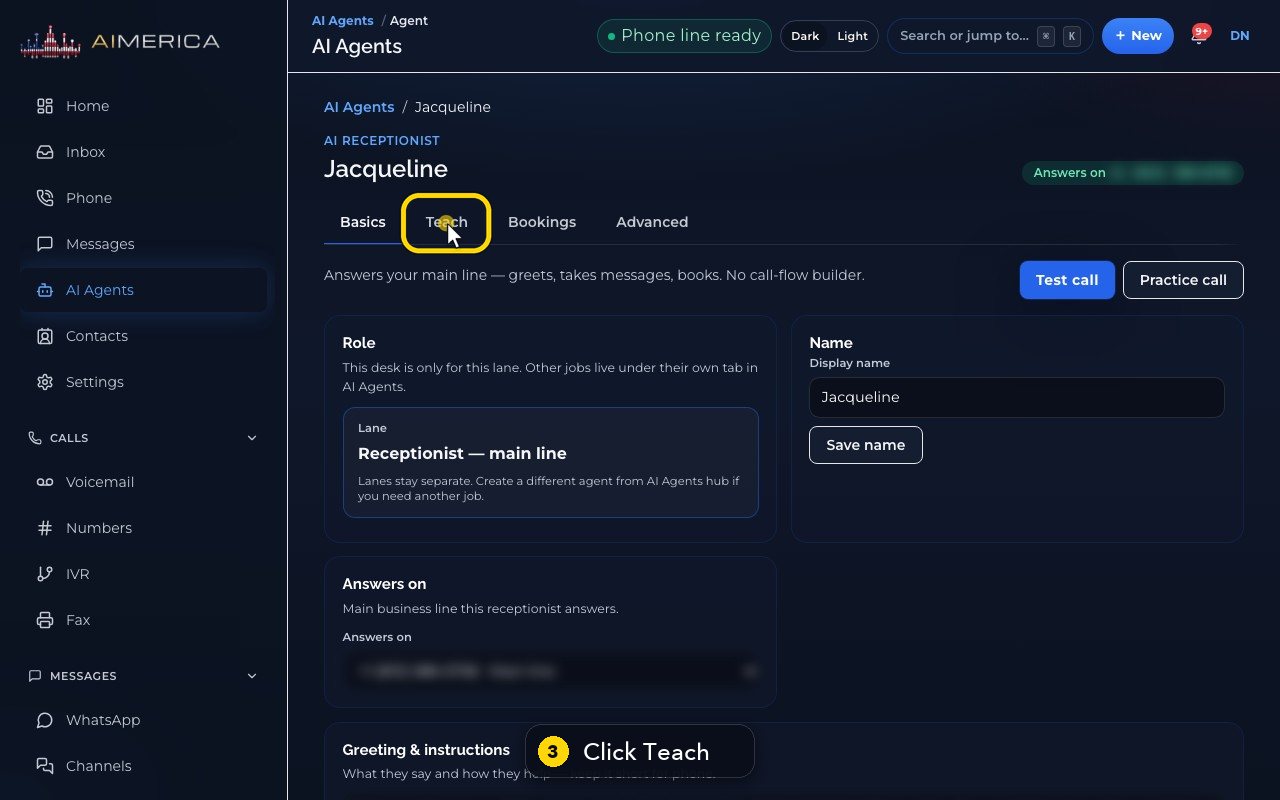
Her facts are on the Teach tab. Click Teach.
- 4
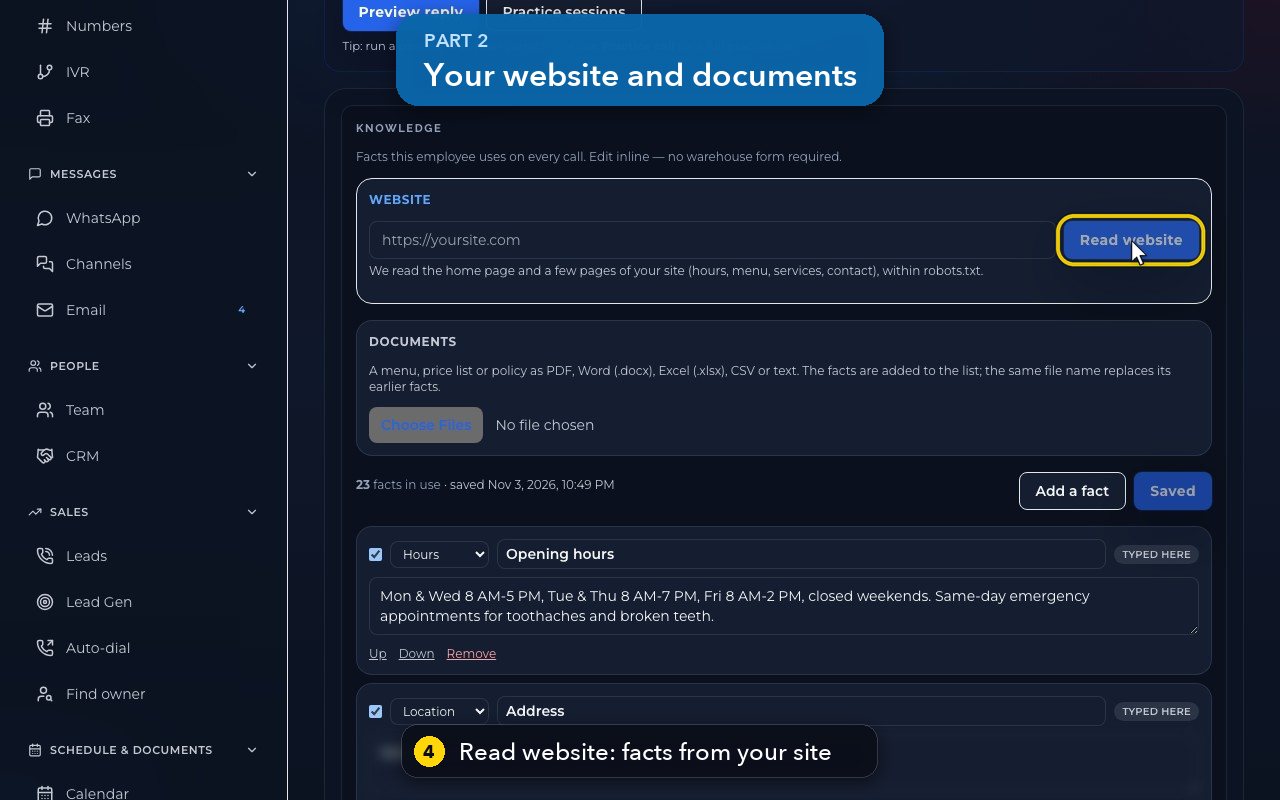
Scroll down to Knowledge. Read website reads a few pages of your site, and adds the facts it finds right away.
- 5
You can also upload a menu, a price list or a policy, as PDF, Word, Excel, CSV or text.
- 6
Below is the list she uses on every call. Each fact has a category, a short name, and the sentence she says.
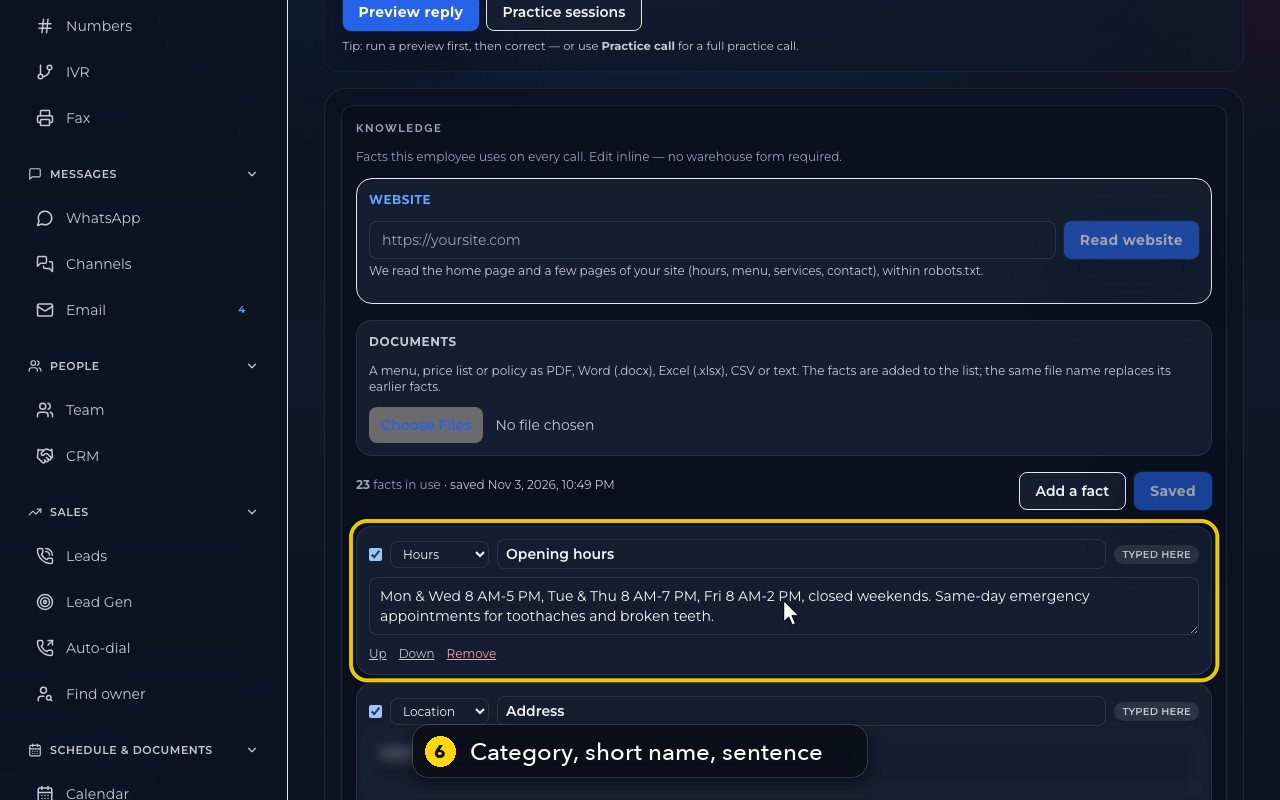
- 7
Untick In use to switch a fact off, without deleting it.
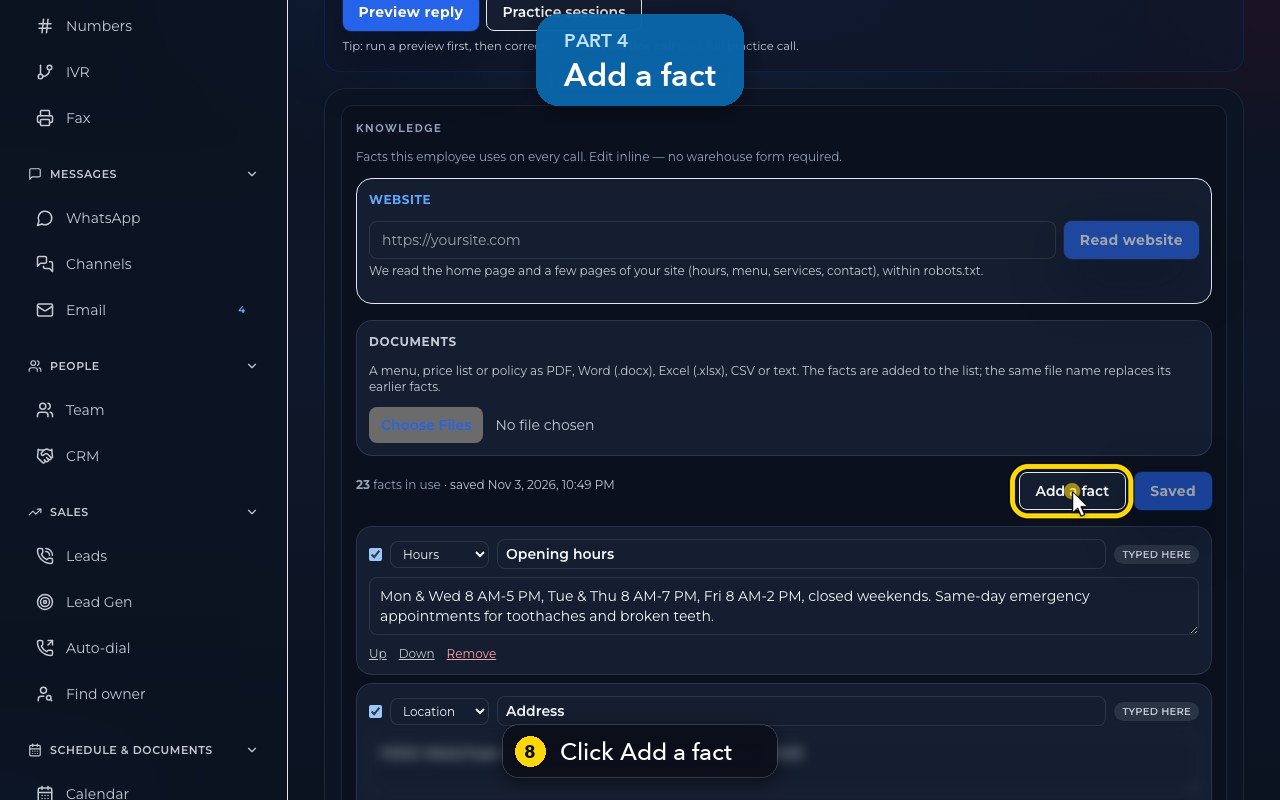
- 8
To add one, click Add a fact.
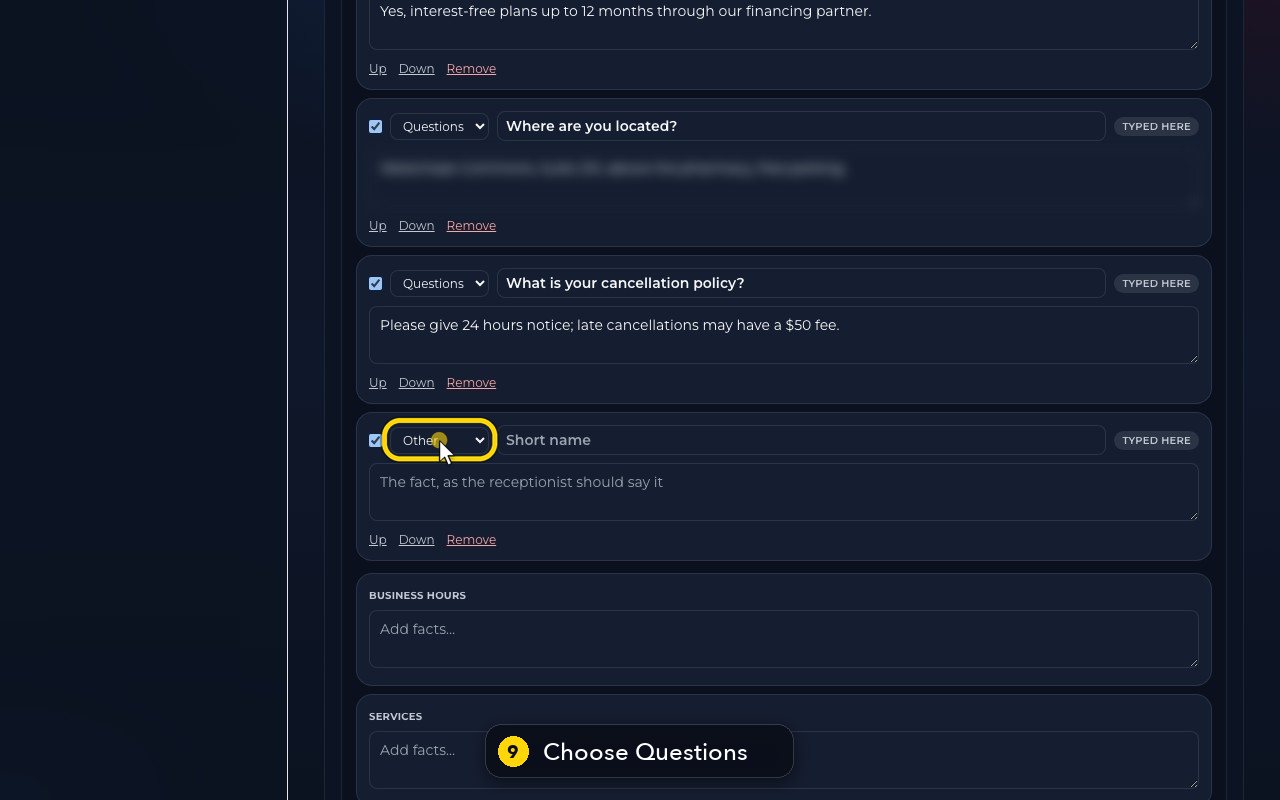
- 9
A new, empty fact appears at the end of the list. Common questions go in Questions, like the cancellation policy above it.
- 10
Type the question as its short name.
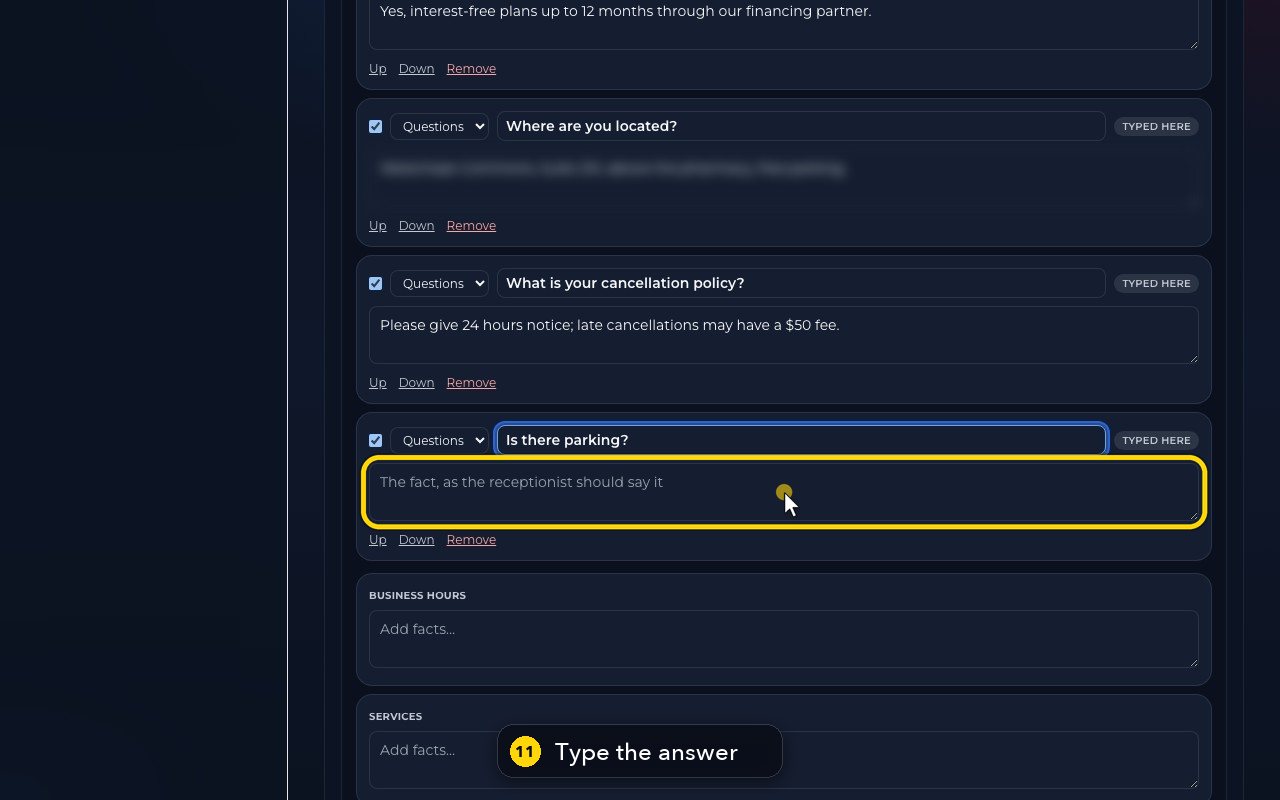
- 11
Then type the answer, exactly as she should say it.
- 12
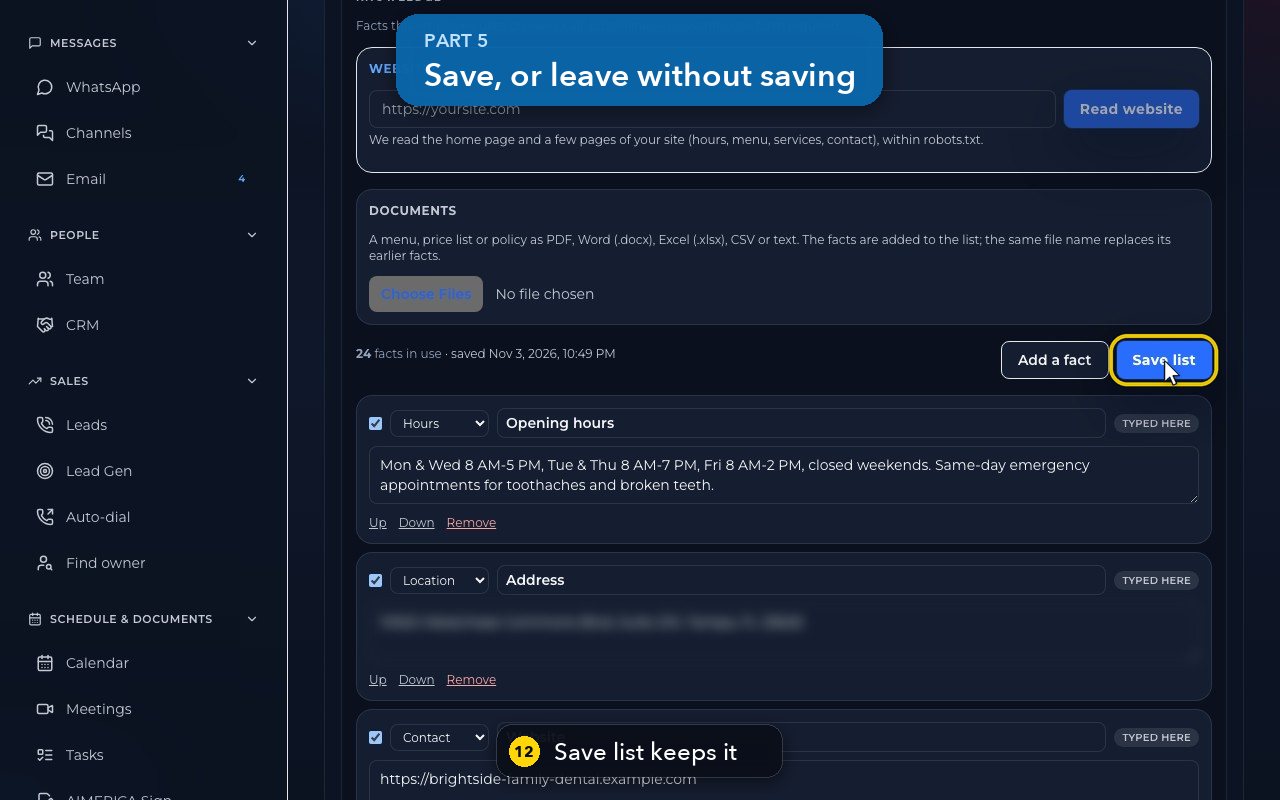
Click Save list to keep it. She uses the saved list on every call. In this demo, we do not save.
- 13
Now leave this tab: click Basics. The fact we did not save is dropped.
- 14
Back on Teach, the list is just as it was: 23 facts, all saved.
Change your receptionist's greeting and name
Find the first sentence callers hear and your receptionist's name, and see how to change them.
Open AI Agents, then your receptionist, then the Basics tab. Display name is her name in your lists. The first line of Greeting & instructions is the sentence callers hear first.
In this video
Step by step (6 steps)
- 1
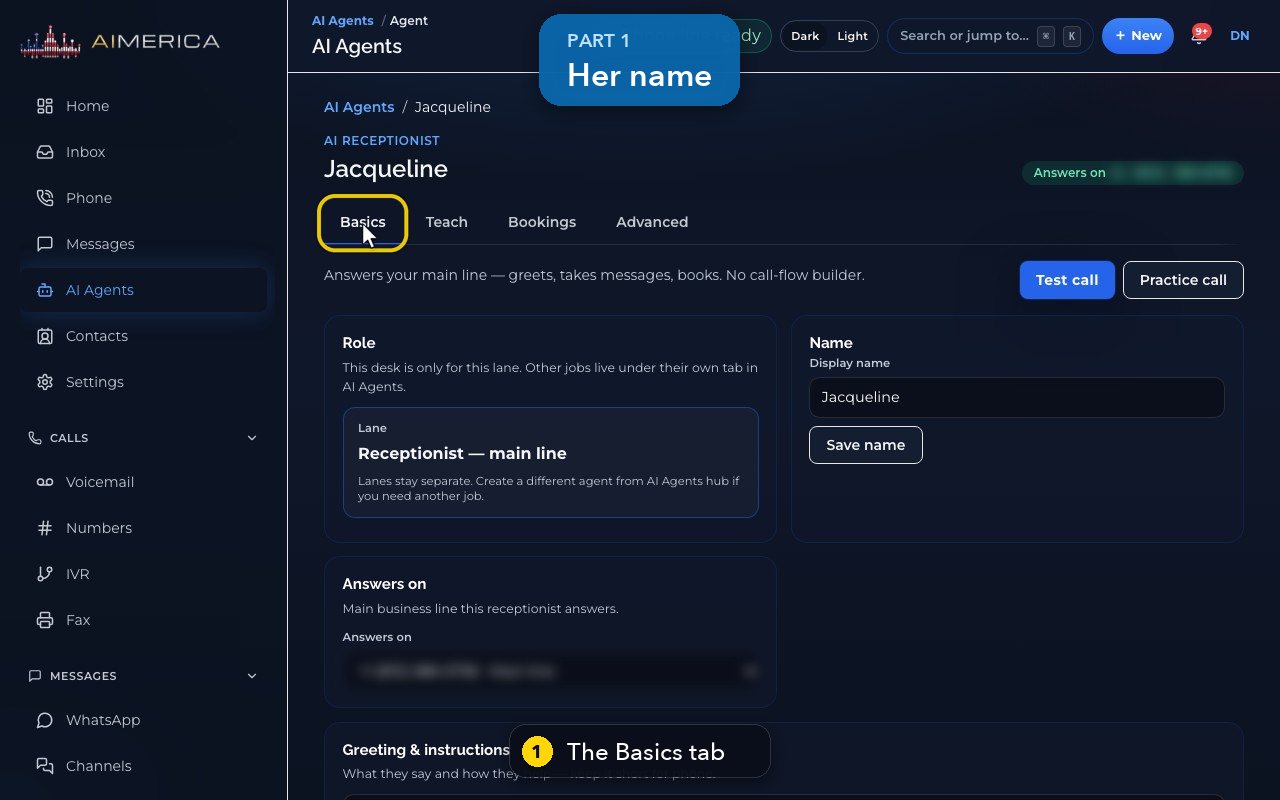
Her name and greeting are on the Basics tab of her page.
- 2
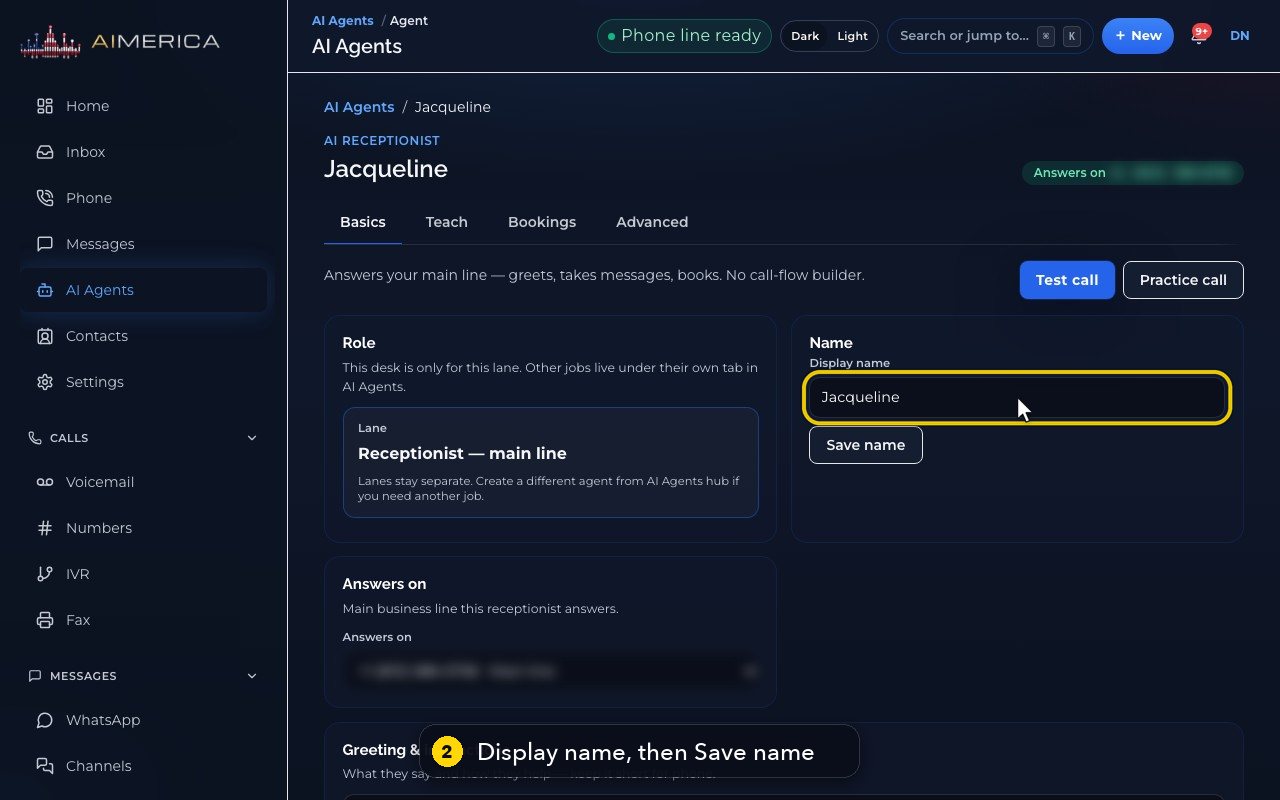
Display name is the name on her page and in your lists. Save name keeps a new one.
- 3
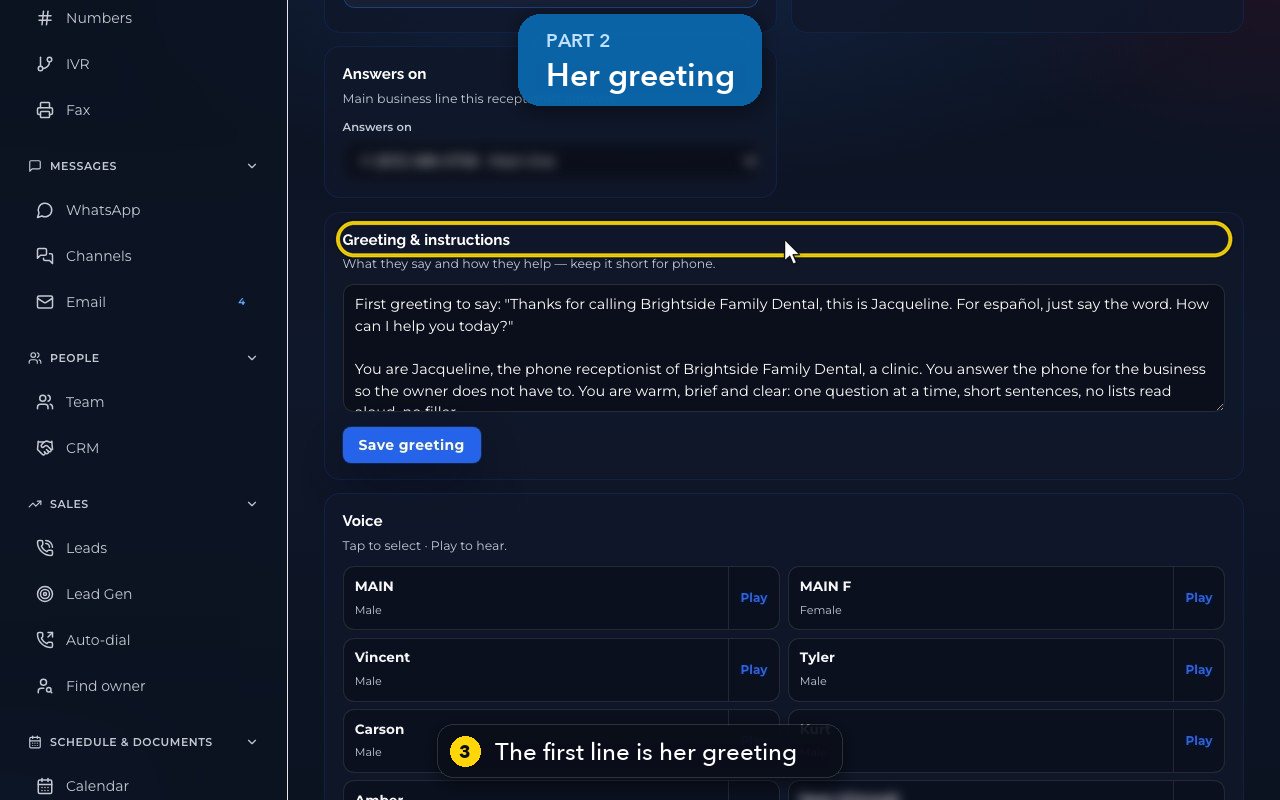
Greeting and instructions holds everything she follows. The first line is the greeting she says when she answers.
- 4
To change it, edit only the words inside the quotes, her name included. Keep it short: she says it on every call.
- 5
Below the greeting are the rules she follows. The guided setup wrote them, so change them only if you are sure.
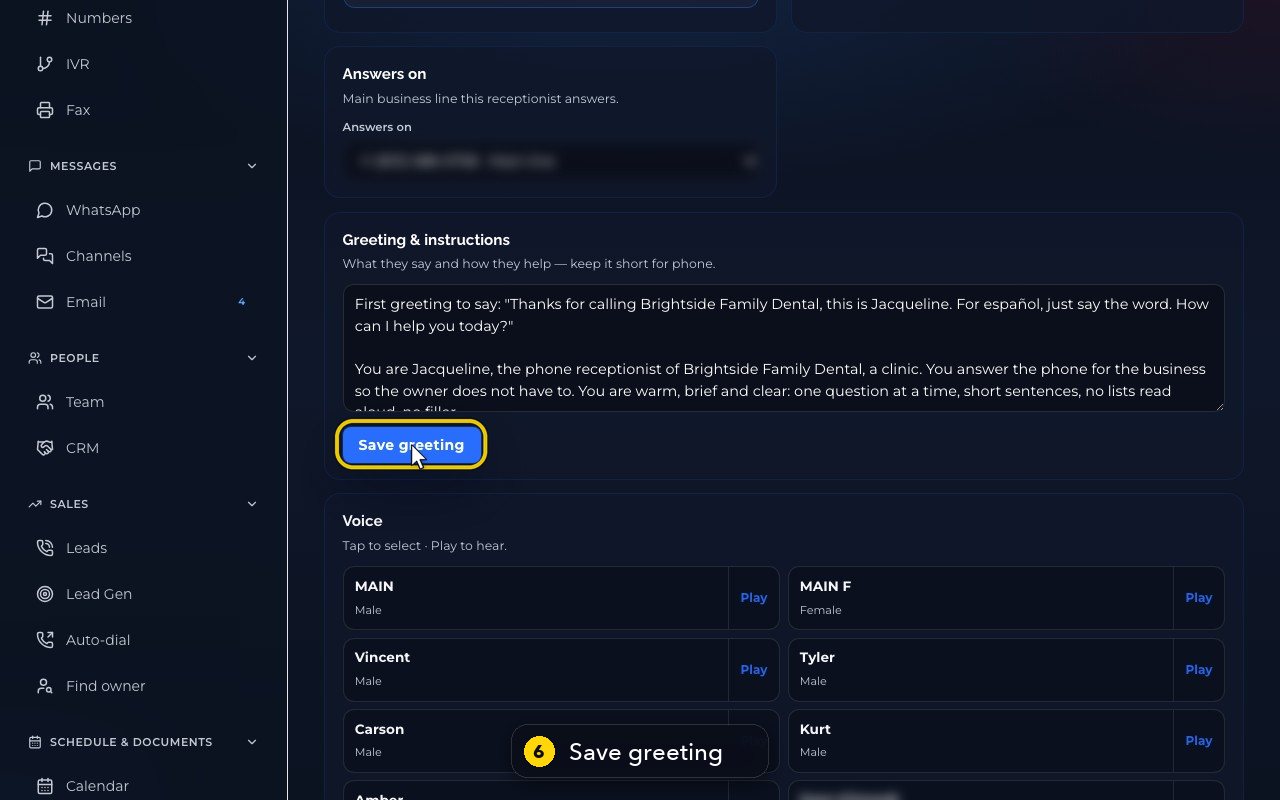
- 6
Save greeting saves the whole box, and she uses it from her next call. In this demo, we do not save.
Pick your receptionist's voice
Hear the receptionist voices and see how to switch yours to another one.
Open AI Agents, then your receptionist, then the Advanced tab. Under Voice, the voice she uses is marked Selected. The play button plays a sample; Choose switches her voice from her next call.
In this video
Step by step (8 steps)
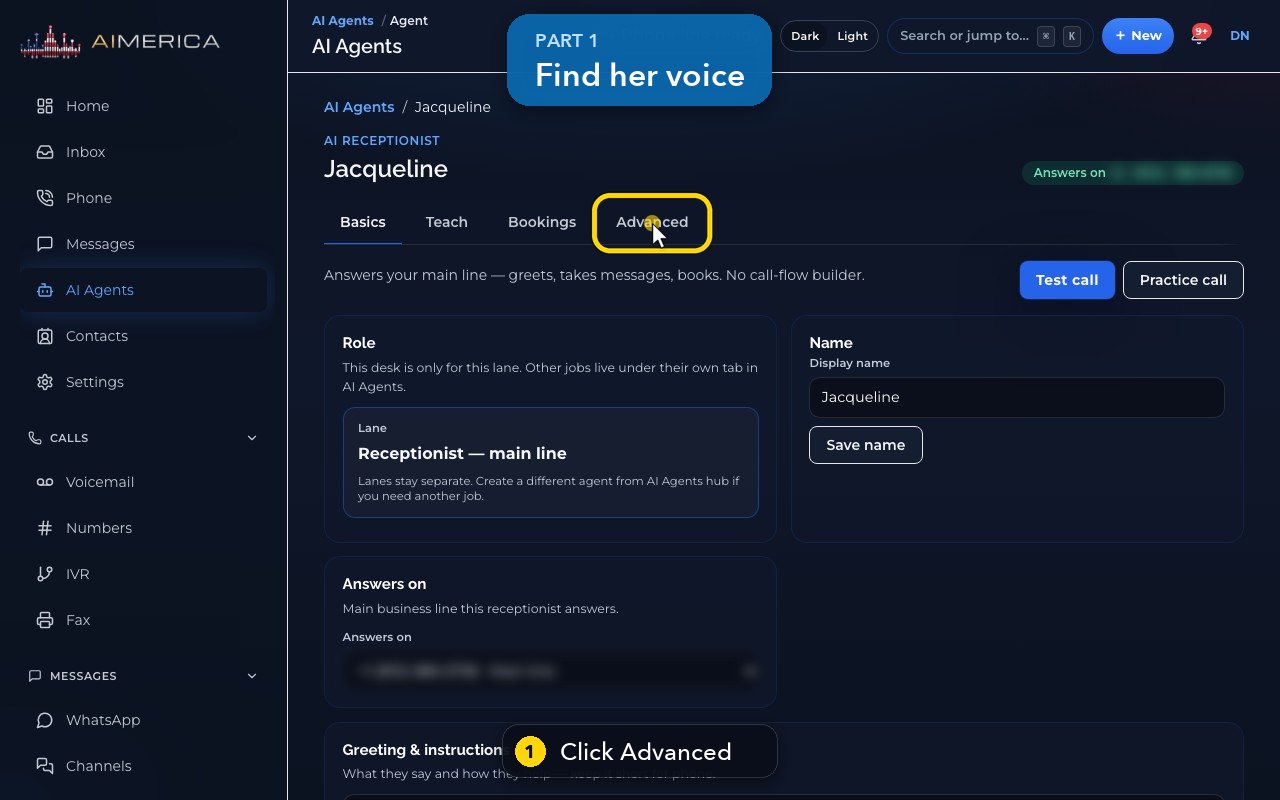
- 1
Her voice is on the Advanced tab of her page.
- 2
Further down, the voice she uses now is marked Selected.
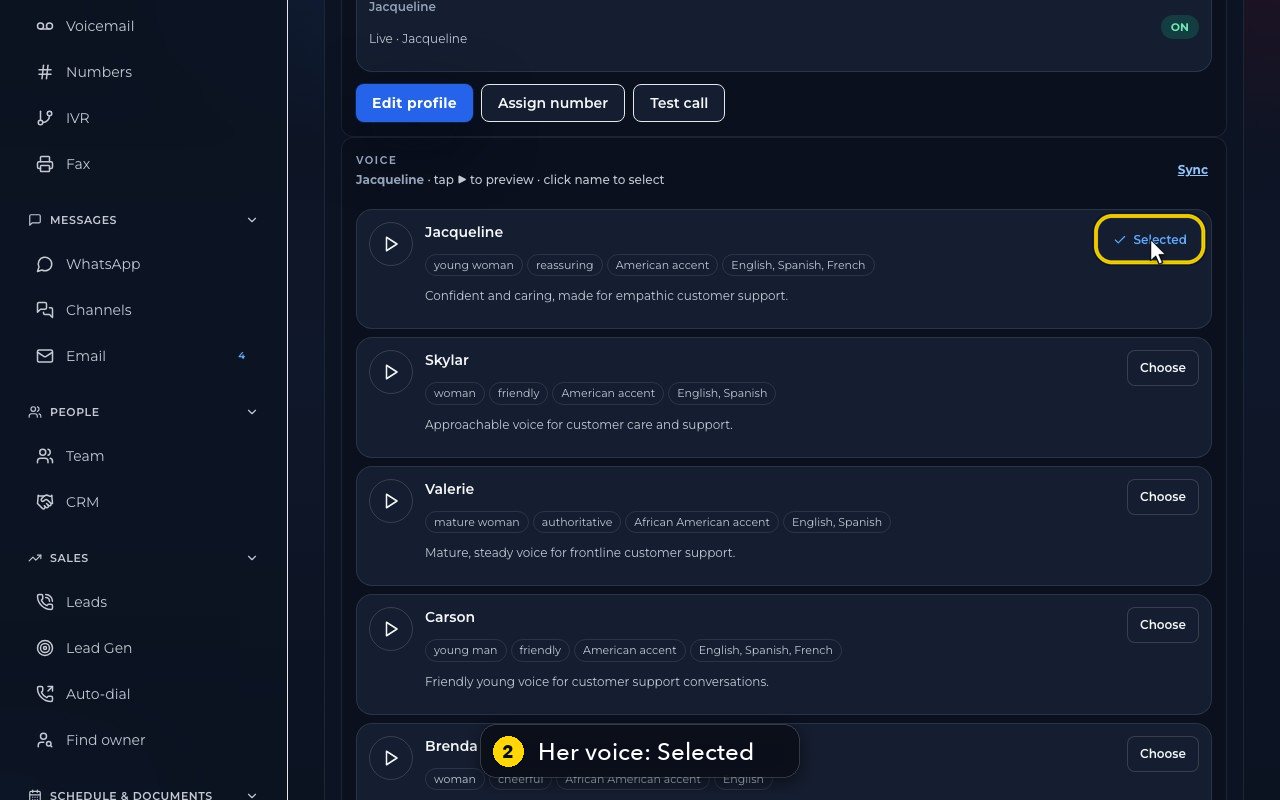
- 3
Each card says how the voice sounds, and the languages it speaks. Jacqueline speaks English, Spanish and French.
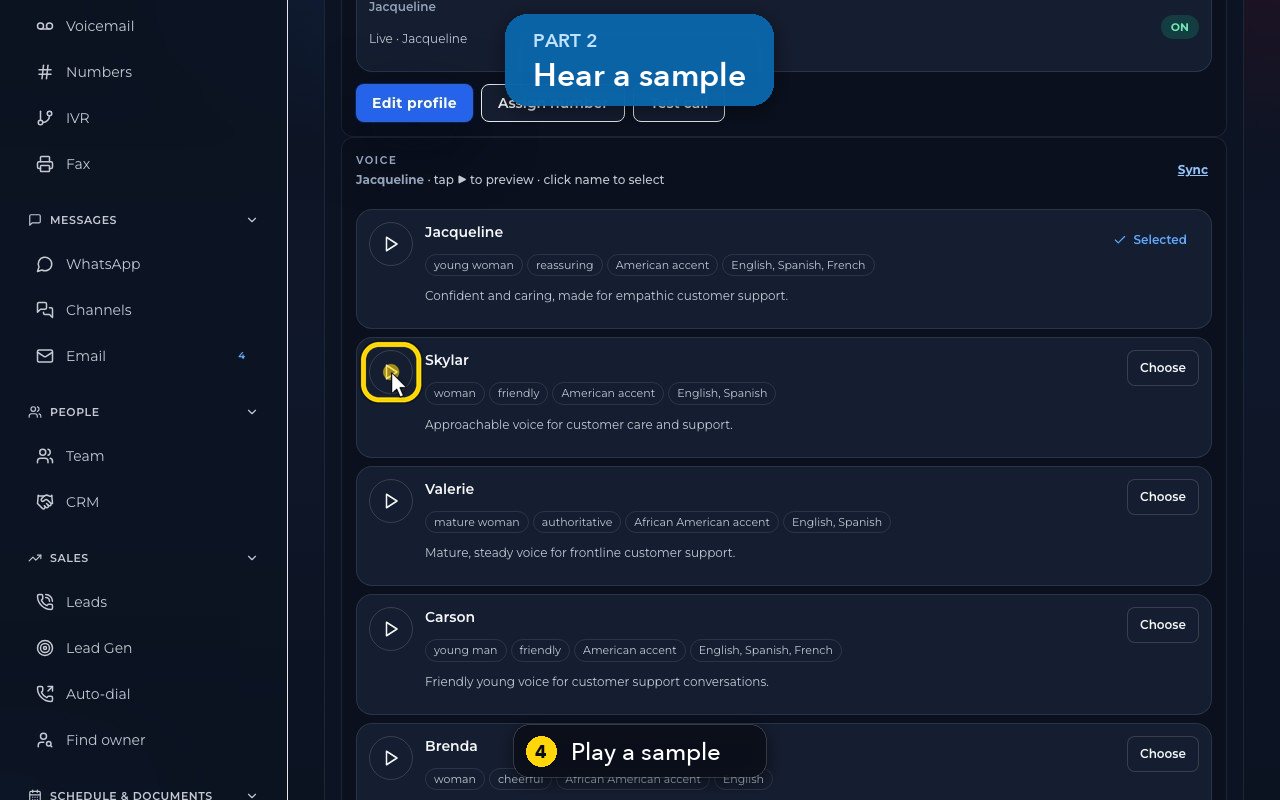
- 4
The play button plays a short sample of each voice, like Skylar's.
- 5
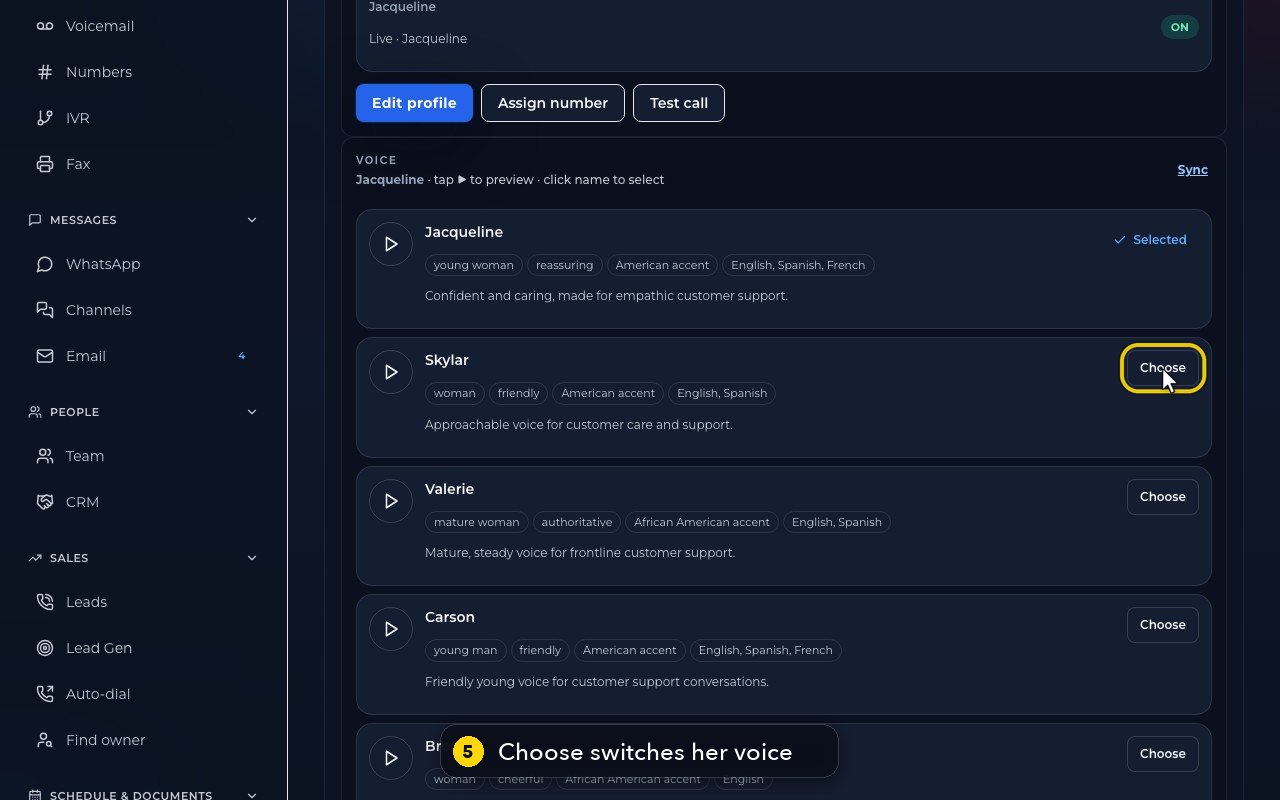
Choose switches her voice right away, from her next call. Here, we only show it.
- 6
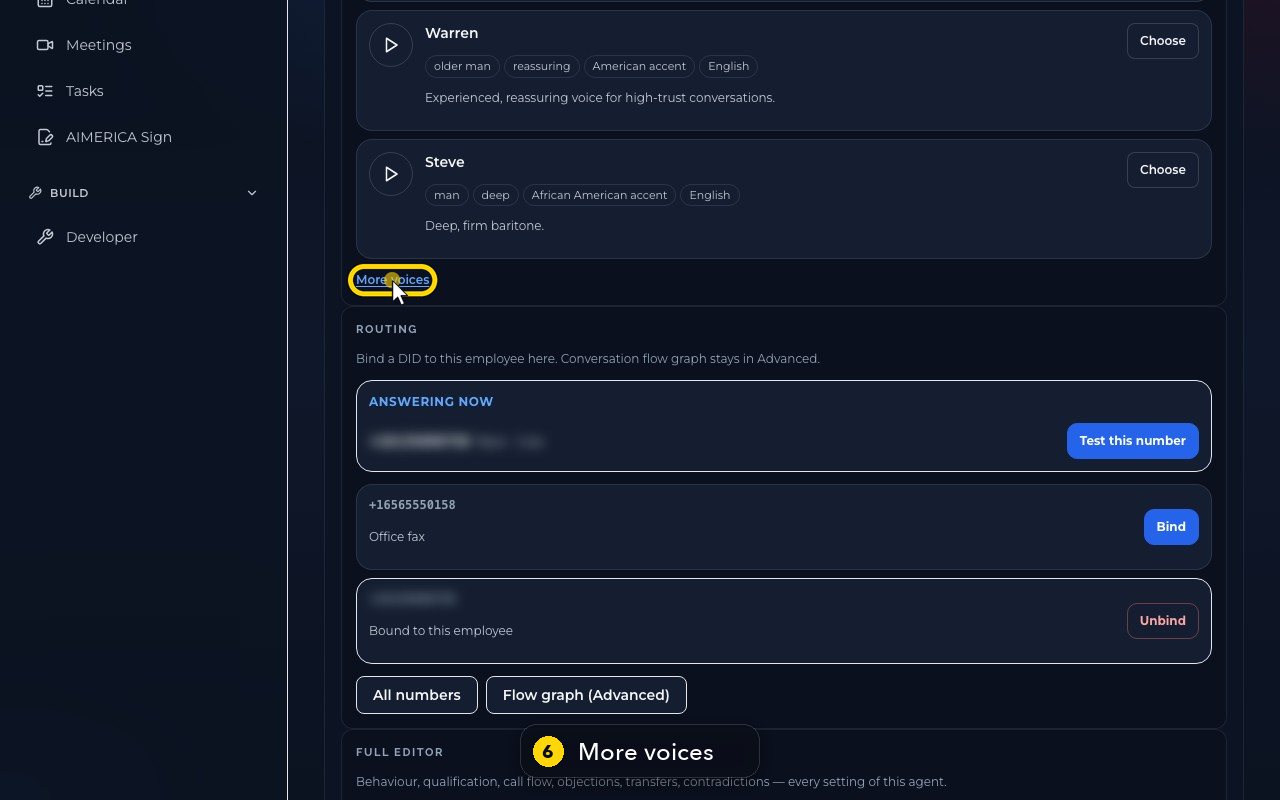
For the rest of the list, press More voices. It adds voices for Spanish, French and Portuguese.
- 7
Fewer voices folds the list again.
- 8
Pick a voice that suits your callers. If many of them speak Spanish, pick one that speaks Spanish.
Choose which line your receptionist answers
See which phone number your receptionist answers and where you move her to another line.
The badge at the top of your receptionist's page says which number she answers. Move her with Answers on on the Basics tab, or with Bind and Unbind under Routing on the Advanced tab.
In this video
Step by step (8 steps)
- 1
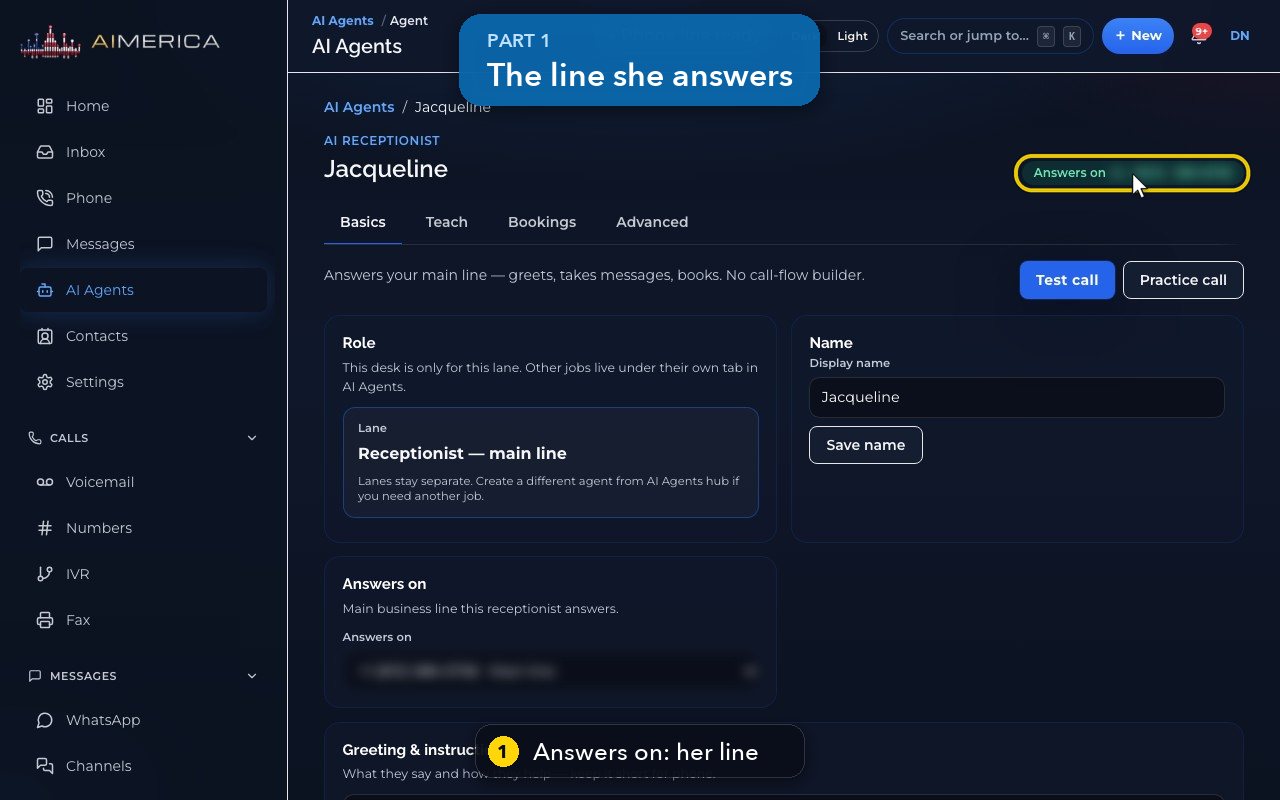
The badge at the top says which number she answers. Calls to that number reach her first.
- 2
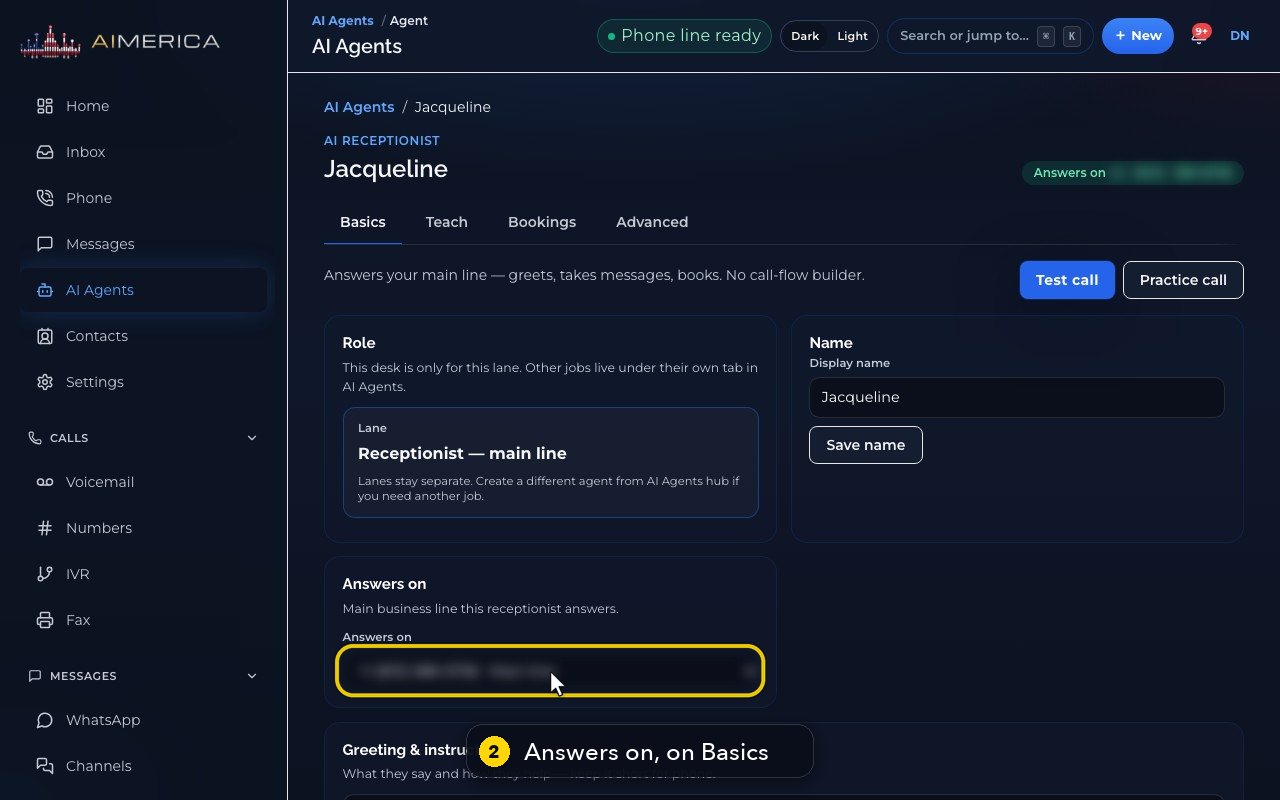
On Basics, Answers on shows the same line. Its list also holds your other numbers, like the office fax line.
- 3
Picking another number moves her there at once, even from a line another AI agent uses. So pick only when you are ready.
- 4
Now open the Advanced tab.
- 5
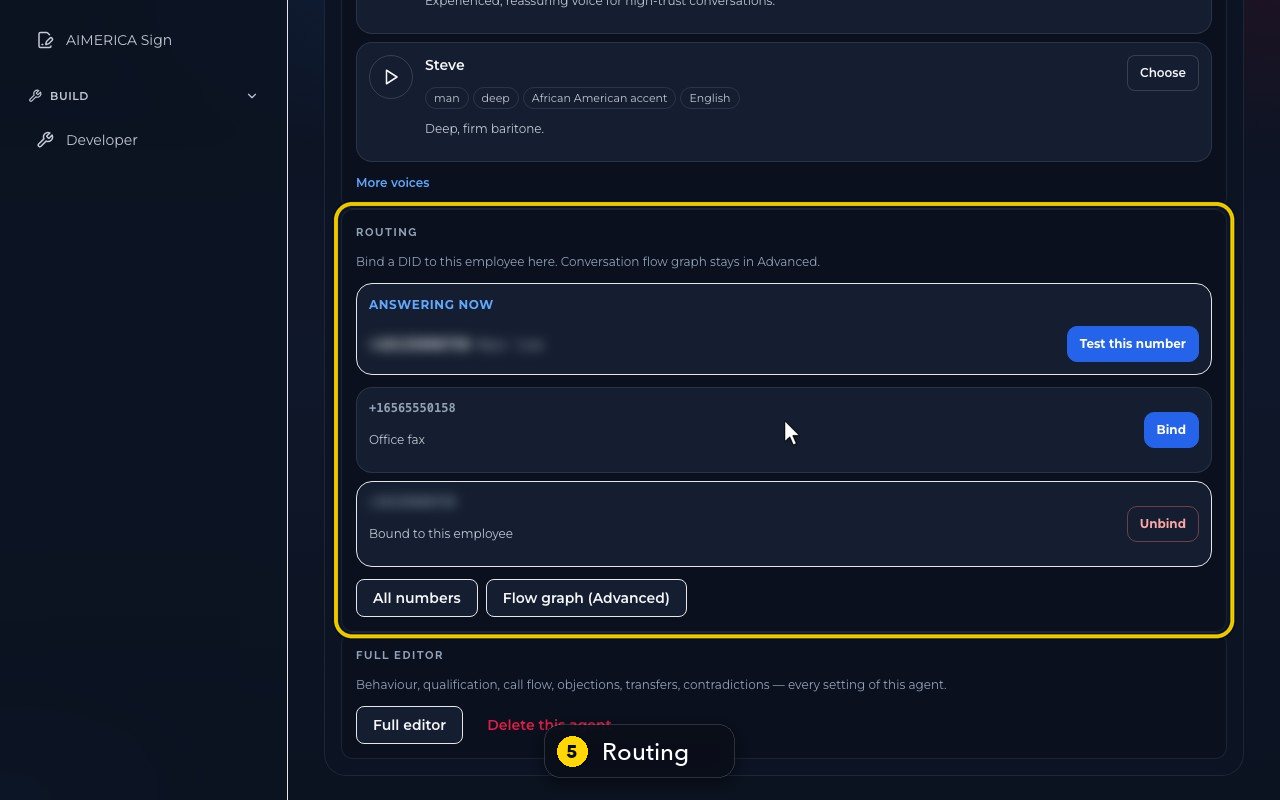
Routing shows the line she answers now, and every other number.
- 6
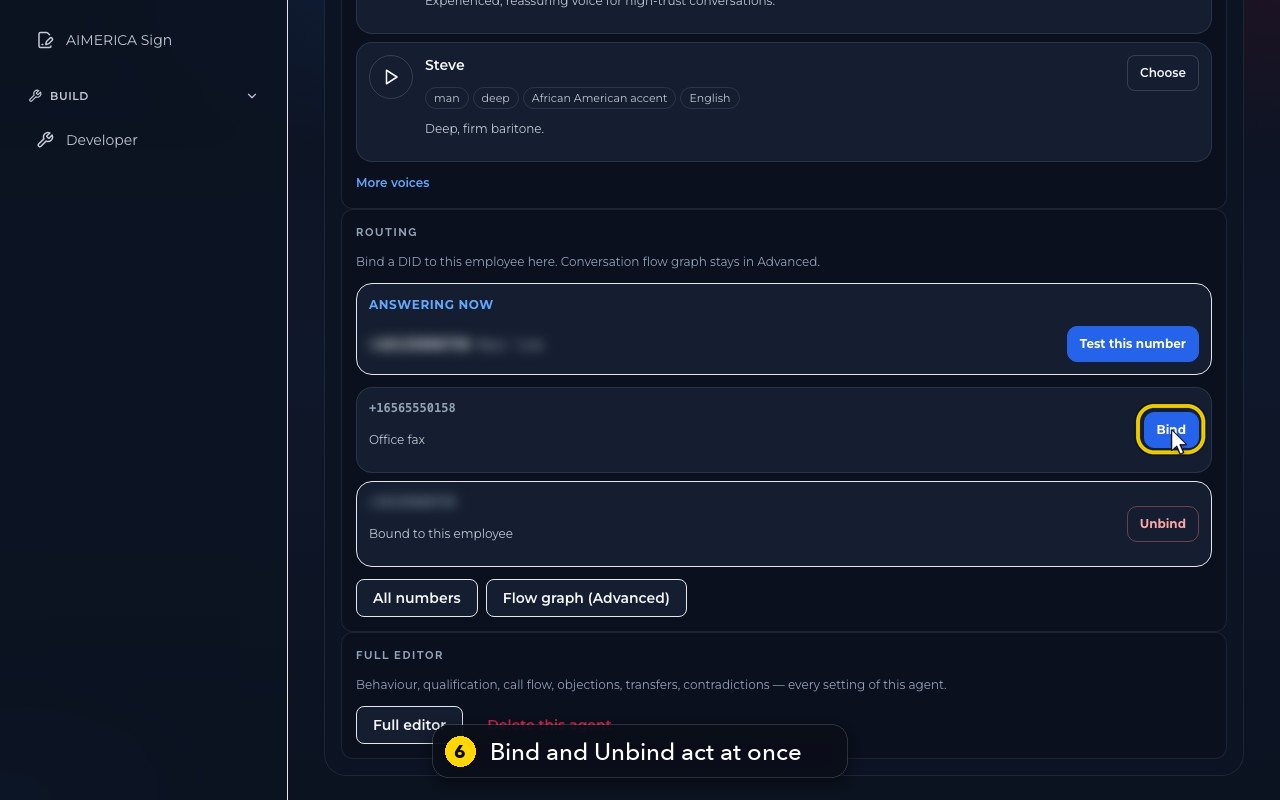
Bind gives a line to her, and Unbind frees it. Both act at once, so use them when you are ready.
- 7
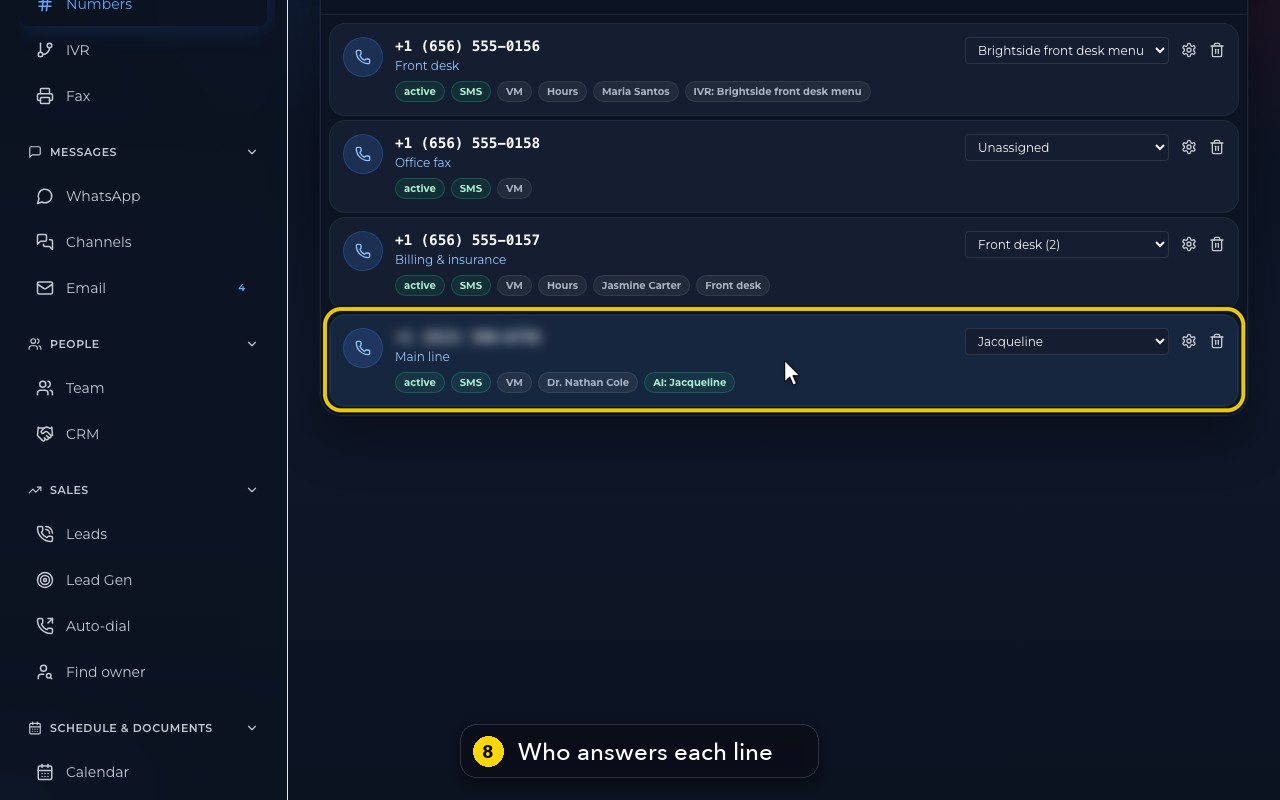
All numbers opens Numbers, where you see who answers each line.
- 8
Here, Jacqueline answers the main line. A new receptionist gets her line on the last step of the guided setup.
In short
- The guided setup asks six short questions: your kind of business, your business, what callers want, what she collects, transfer and languages, and her voice and name.
- Pick the line she answers, then press Create my receptionist.
- Then open her page in AI Agents: Basics holds her name, line, greeting, voice and who she transfers to; Teach holds her facts; Bookings holds her calendars and opening hours.
- Call your line from your own phone to hear her.
When she takes a message or a call needs a person, the people on that line get an email with who called, a summary, what to do next and the conversation.
Related tutorials
 1:18VideoFind your AI receptionist and her settingsOpen AI Agents, find your receptionist and learn what each of her four tabs holds.
 1:16VideoSet your receptionist's opening hoursSet the days and times your receptionist treats as open, so she never books or promises a time when you are closed.
 1:15VideoChoose the languages your receptionist speaksSet the language your receptionist answers in and the languages she may switch to.
 1:01VideoLet your receptionist book on your calendarsLink booking calendars so your receptionist books real times, and tell her when to use each one.
 1:14VideoFix a mistake with the receptionist coachTell the coach in plain words what your receptionist did wrong; it proposes a fix you approve, and you can undo it.
 1:27VideoManage the table reservations she takesSee the day's table bookings your receptionist took, find a guest, and add a booking by hand.
Was this not what you needed? Write to us.